Introduction
My kitchen used to stress me out. Every cabinet was a game of Tetris, I owned three vegetable peelers (why?), and finding the turmeric required moving eleven other spices. Then I spent one weekend actually organizing it — not buying cute containers, but thinking about how I use the space. That is what these 25 kitchen organization hacks are about: practical systems that make cooking easier, not prettier Instagram shelves. I have tried every one of these in my own small kitchen. Some took 10 minutes, some took an afternoon, all of them made daily cooking noticeably less frustrating. Your kitchen should work for you, not against you.
1. Decant Dry Goods into Clear Containers
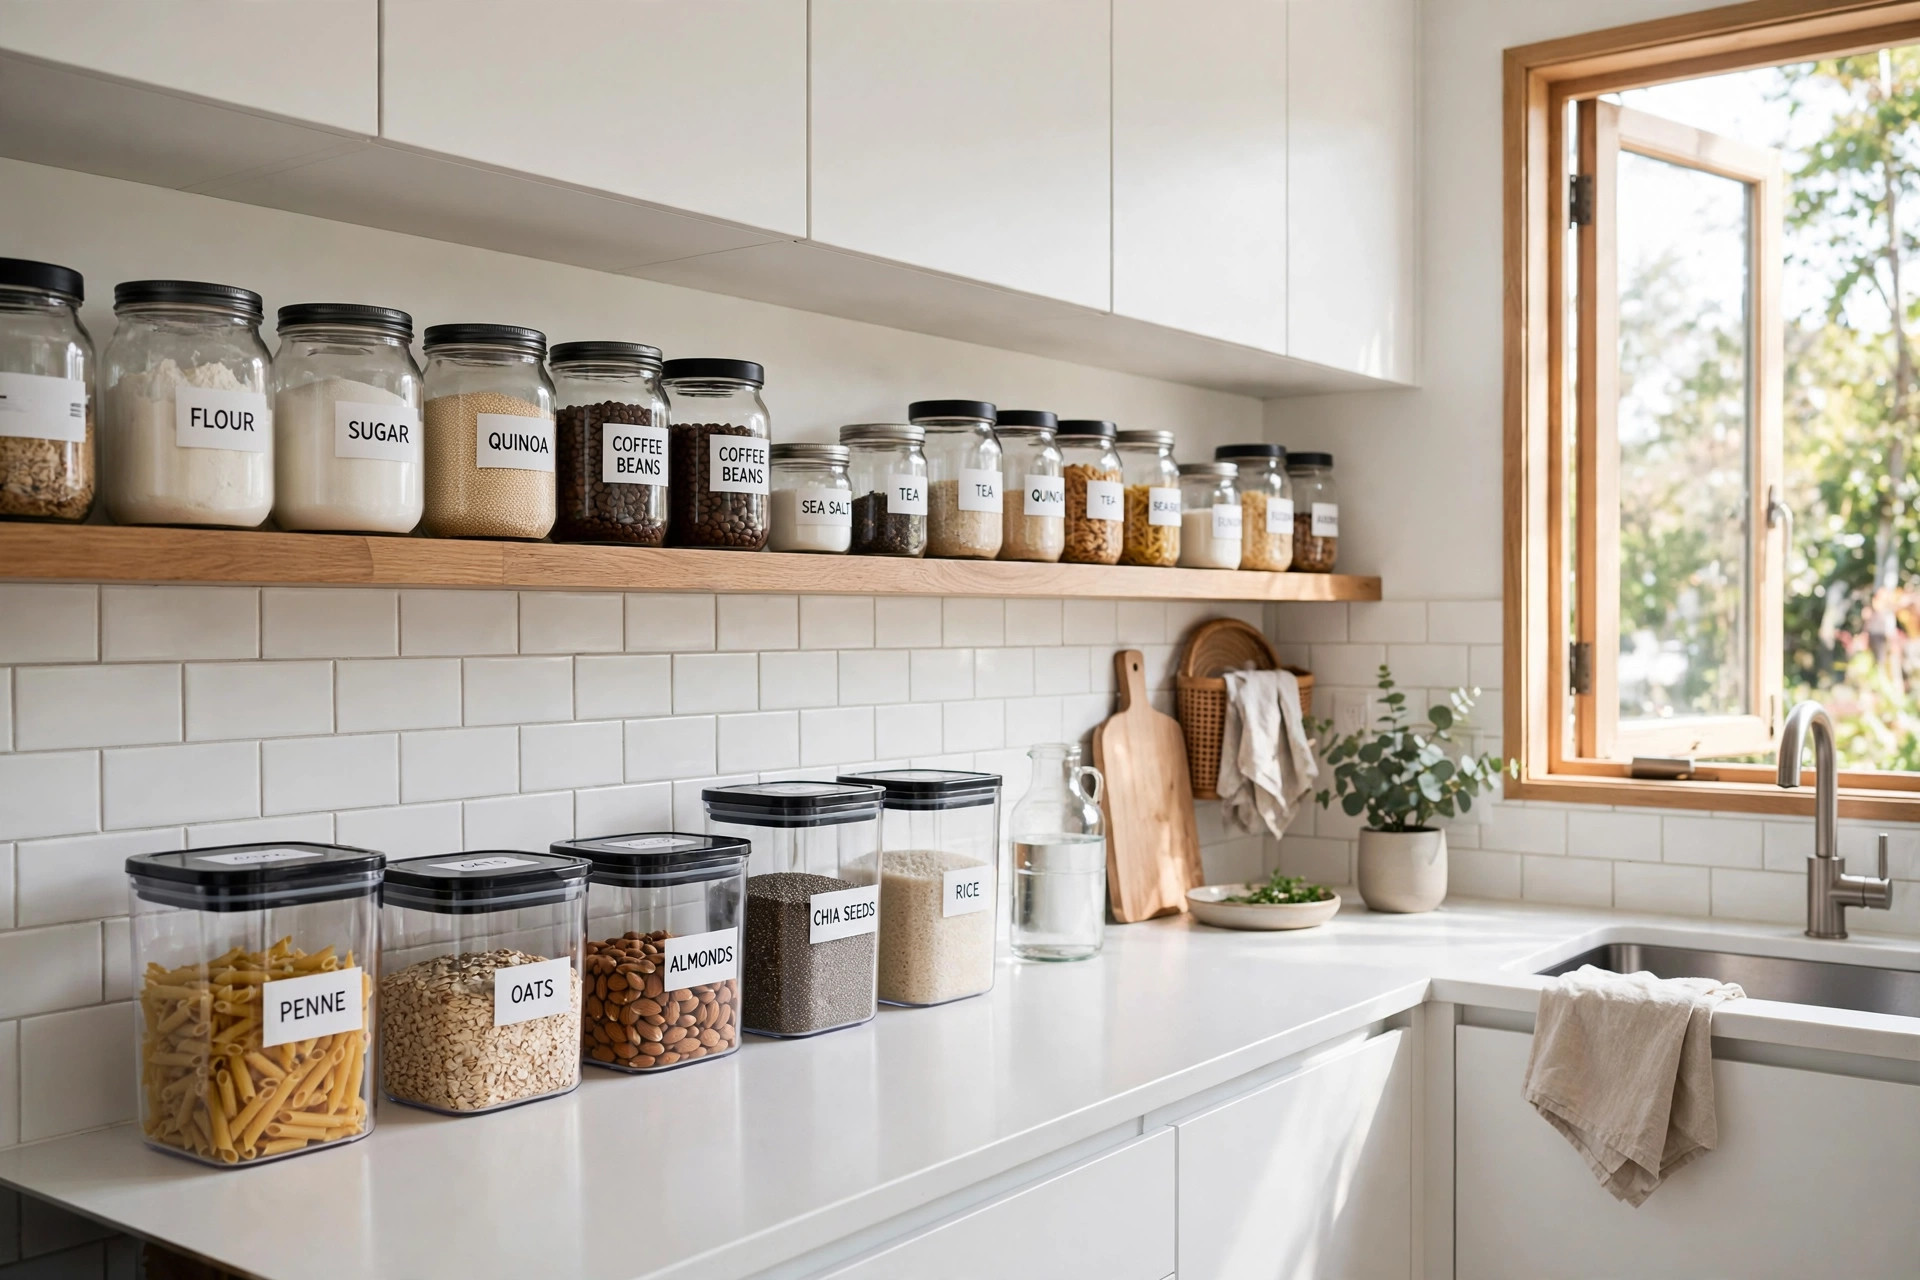
This is the most transformative kitchen hack I know. I transferred flour, sugar, rice, pasta, cereal, and snacks into clear airtight containers — and suddenly I could see everything I owned. No more half-empty bags clip-shut in the back, no more buying rice when I already had rice. I use square containers (they waste less space than round) with labels. The initial investment was about $40 for a set, but I have saved that in reduced food waste. One tip: measure your shelf height before buying — I had to return my first set because they were too tall. Now my pantry looks like a store, and I actually enjoy opening it.
2. Use Tension Rods as Dividers
Tension rods are not just for curtains. I put a short tension rod vertically in my under-sink cabinet to hang spray bottles — they hook right over the rod, freeing the entire cabinet floor. I use another one horizontally in a deep drawer to keep cutting boards and baking sheets upright instead of stacked (stacked means you never use the bottom ones). They cost $3 each and require zero tools. I also have one under my kitchen sink holding my dish soap and sponge — it keeps them off the wet cabinet bottom. This is the cheapest, fastest organization win in the entire kitchen.
3. Install a Pot Lid Organizer
Pot lids are the worst — they do not stack, they slide, they clatter. I mounted a simple lid organizer on the inside of my cabinet door, and it changed everything. Each lid has its own slot, visible and grabbable. Before this, my lids lived in a chaotic pile that required excavation. The door-mounted version uses dead space and keeps lids off the shelves where pots need room. I got mine for $12. If you cannot mount anything (renters), the countertop vertical lid holders work almost as well. Either way, stop stacking lids — it is the source of 90% of cabinet avalanches.

4. Magnetic Knife Strip Instead of a Block
A knife block eats a full square foot of counter. A magnetic strip on the wall holds the same knives in zero counter space — and you can see every blade, so you grab the right one. I mounted mine at eye level near my prep area. Get a strong magnet (neodymium); cheap ones drop knives, which is terrifying. I also use a small magnetic strip inside a cabinet door for spice tins — the round metal tins stick right to it. This freed up my entire knife block footprint, which is now a charging station. If you have kids, mount it high enough that little hands cannot reach.
5. Over-the-Cabinet-Door Cutting Board Holder
Cutting boards are awkward — too big for drawers, annoying to stack. I hang mine on the inside of a cabinet door using an over-the-door wire rack. They are vertical, visible, and take zero shelf space. I have three boards (wood for bread, plastic for meat, small one for garnish) and they all fit on one door. The rack was $10. Before this, my cutting boards lived leaning against the backsplash, collecting dust and looking messy. Now they are hidden but instantly accessible. This works for baking sheets and cooling racks too — anything flat and awkward.
6. Lazy Susan in Deep Cabinets
Deep corner cabinets are where things go to die. A lazy Susan (turntable) brings the back to the front with a spin. I have one in my corner cabinet for oils, vinegars, and sauces — nothing gets lost anymore. Get the two-tier version if you have height; it doubles the capacity. I also put a small lazy Susan in my fridge for condiments (game-changer) and one under the sink for cleaning supplies. They are $15-25 each. The key is not overloading them — if it is too heavy to spin easily, you have too much stuff. I purged before installing mine.

7. Command Center on the Fridge Side
The side of your fridge (not the front) is prime real estate. I mounted a magnetic whiteboard, a magnetic pen holder, and small magnetic bins on mine. It holds my grocery list, takeout menus, batteries, and random essentials. The front stays clean (no more cluttered magnets), and the side is actually more accessible when you are cooking. I use the whiteboard for my weekly meal plan — seeing it while I cook keeps me on track. Magnetic spice tins also work great here. This turned a blank metal panel into the most-used square foot in my kitchen.
8. Drawer Dividers for Utensils
Just like bedroom drawers, kitchen drawers need dividers. I put adjustable bamboo dividers in my utensil drawer, and now every spatula, whisk, and peeler has a home. Before, it was a tangled mess where I could never find the can opener. I also divided my “junk drawer” (everyone has one) into sections: batteries, tape, scissors, random. It is still a junk drawer, but now it is an organized junk drawer. The dividers cost $15 for a set. I measured my drawers first — “adjustable” still has limits. This is a 20-minute project with immediate daily payoff.
9. Hang Pots from a Ceiling Rack
If you are short on cabinet space, a ceiling-mounted pot rack frees up an entire cabinet. I hung one over my kitchen island — it holds 8 pots and pans that used to cram two cabinets. It also looks great; copper and cast iron are beautiful when displayed. You MUST mount into ceiling joists (not just drywall) — pots are heavy. I had a handyman do it for $50 because I did not trust myself. If you cannot mount to the ceiling, a wall-mounted rail with S-hooks works similarly. Just keep it over an area where dripping is not an issue (not over the dining table).

10. Use the Inside of Cabinet Doors
Cabinet door interiors are free storage. I have mounted: a lid organizer (pots), a wrap organizer (foil/plastic wrap on a door-mounted rack), a measuring cup hook strip, and a small whiteboard for notes. Each one uses space that was completely wasted. The key is keeping additions shallow (under 3 inches) so the door still closes. I use 3M adhesive strips for lightweight items (no holes for renters) and small screws for heavier ones. Walk through your kitchen and open every cabinet door — I bet at least three are completely bare inside. That is free square footage.
11. Stackable Shelf Risers
Cabinet shelves are usually too tall — you get one layer of items and 8 inches of wasted air above. Shelf risers (small wire or bamboo platforms) create a second level. I use them for mugs (two rows instead of one), canned goods, and spices. They instantly double your shelf capacity. They are $10-15 for a set of two. I have them in three cabinets. The bamboo ones look nicer if the cabinet is visible; wire is fine for closed cabinets. This is the simplest way to fix the “tall shelf, short items” problem that plagues every kitchen.
12. File-Fold Kitchen Towels and Cloths
I file-fold my kitchen towels just like clothes — folded into rectangles and stood upright in a drawer. I can see every towel at once instead of digging through a stack. It takes the same drawer space but triples the visibility. I also do this with reusable grocery bags (folded flat and filed) and placemats. The method is the same as the bedroom drawer organization — visibility prevents waste. I purged my towel collection when I did this and discovered I had 23 towels for a household of two. Now I have 8, and it is plenty.

13. Designate a “Landing Zone” Near the Entrance
Kitchen clutter often comes from outside the kitchen — mail, keys, bags dumped on the counter. I created a landing zone just inside my kitchen entrance: a small tray for keys, a wall-mounted mail holder, and hooks for bags. Everything that enters the kitchen now has a home that is not the counter. My counters stayed clear for the first time ever. The tray was $8, the mail holder $15. It took 10 minutes to set up. This is not technically “kitchen organization,” but it solved 50% of my counter clutter. The kitchen cannot stay organized if it is the dumping ground for the whole house.
14. Group by Zone, Not by Type
Stop organizing by category (all baking together, all spices together) and start organizing by zone — keep things where you use them. I moved my coffee supplies next to the coffee maker (not in the pantry), cooking oils next to the stove (not in a far cabinet), and dish soap under the sink (not with cleaning supplies). It sounds obvious, but most kitchens are organized by type from when you unpacked. I spent an afternoon moving things to their “use zones” and my cooking flow improved dramatically. Fewer steps, less backtracking. Think about your kitchen in work triangles: prep, cook, clean — and store accordingly.
15. Use Clear Bins for Fridge Categories
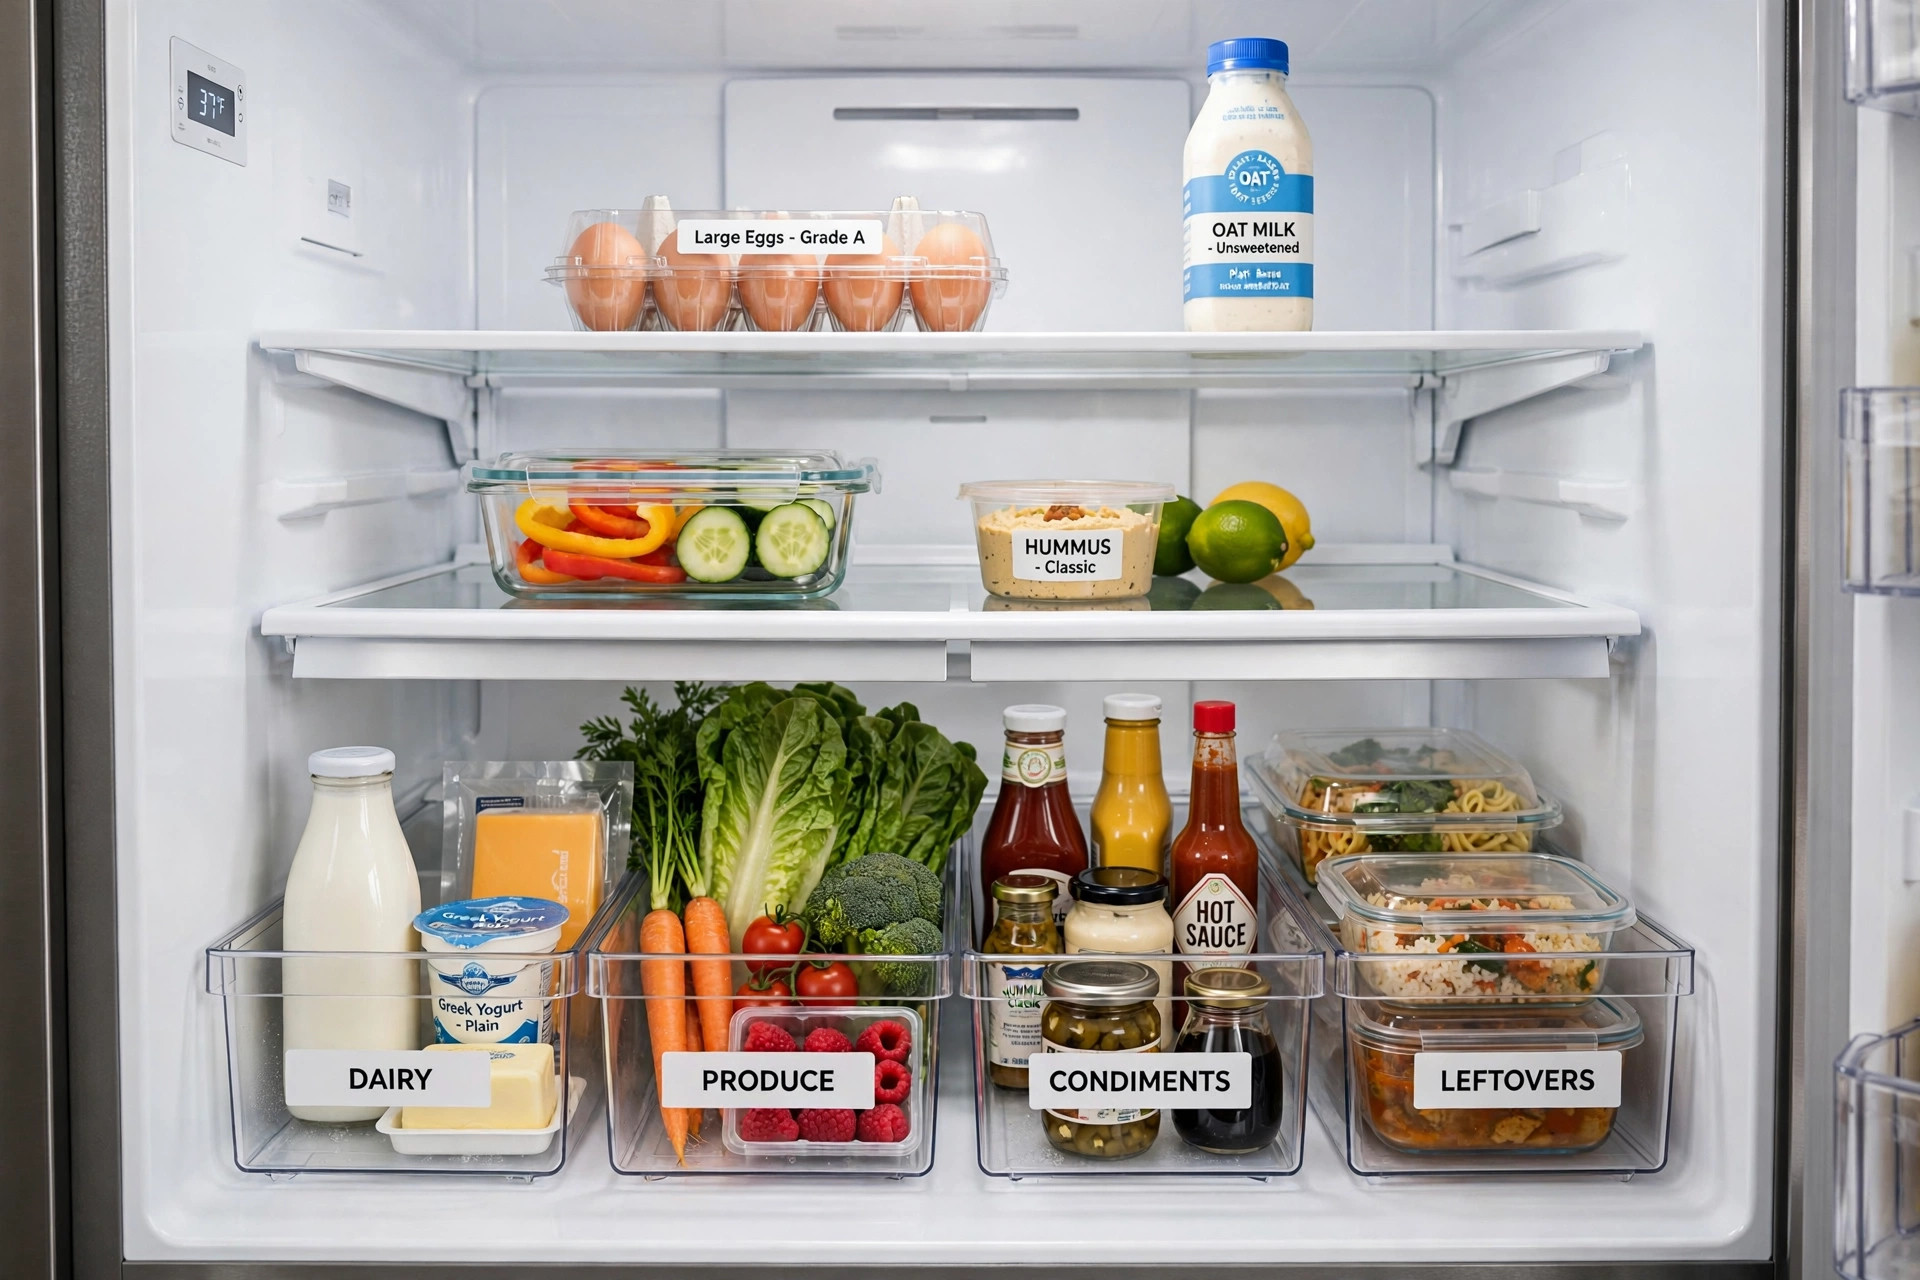
The fridge is a kitchen too, and it needs the same system. I use clear bins labeled “dairy,” “produce,” “condiments,” “leftovers,” and “snacks.” Everything has a zone, so I can see what I have without moving things around. The “eat first” bin in front holds items expiring soon — this alone cut my food waste in half. I buy the bins at the dollar store; they do not need to be fancy. Wipe them out monthly. My fridge went from chaotic to calm, and I stopped finding mysterious containers in the back. Clear is key — opaque bins become black holes.
16. Install Under-Cabinet Lighting Strips
This is not storage, but it makes your organized kitchen actually usable. I installed LED strip lights under my upper cabinets ($20, peel-and-stick, battery or USB), and suddenly I could see what I was doing. Dark counters hide clutter and make cooking harder. The lights also make the kitchen feel bigger and more modern. I put them on a timer so they come on at dusk. It took 15 minutes. If your kitchen feels cramped and dark, this is the fastest upgrade. You will wonder why you waited. (It also makes your organized shelves visible, which motivates you to keep them that way.)
17. Create a Baking Station
If you bake, dedicate one cabinet or shelf as a baking station — flour, sugar, baking powder, vanilla, mixing bowls, measuring cups, all together. I put mine in the cabinet nearest my mixer. Before, I gathered supplies from four different locations every time I baked. Now I open one cabinet and everything is there. I use a large bin to corral the small items (baking powder, yeast packets) so they do not scatter. This is zone organizing applied specifically. Even if you only bake occasionally, having it all together removes the friction that makes you avoid baking.
18. Hang Mugs Under Cabinets
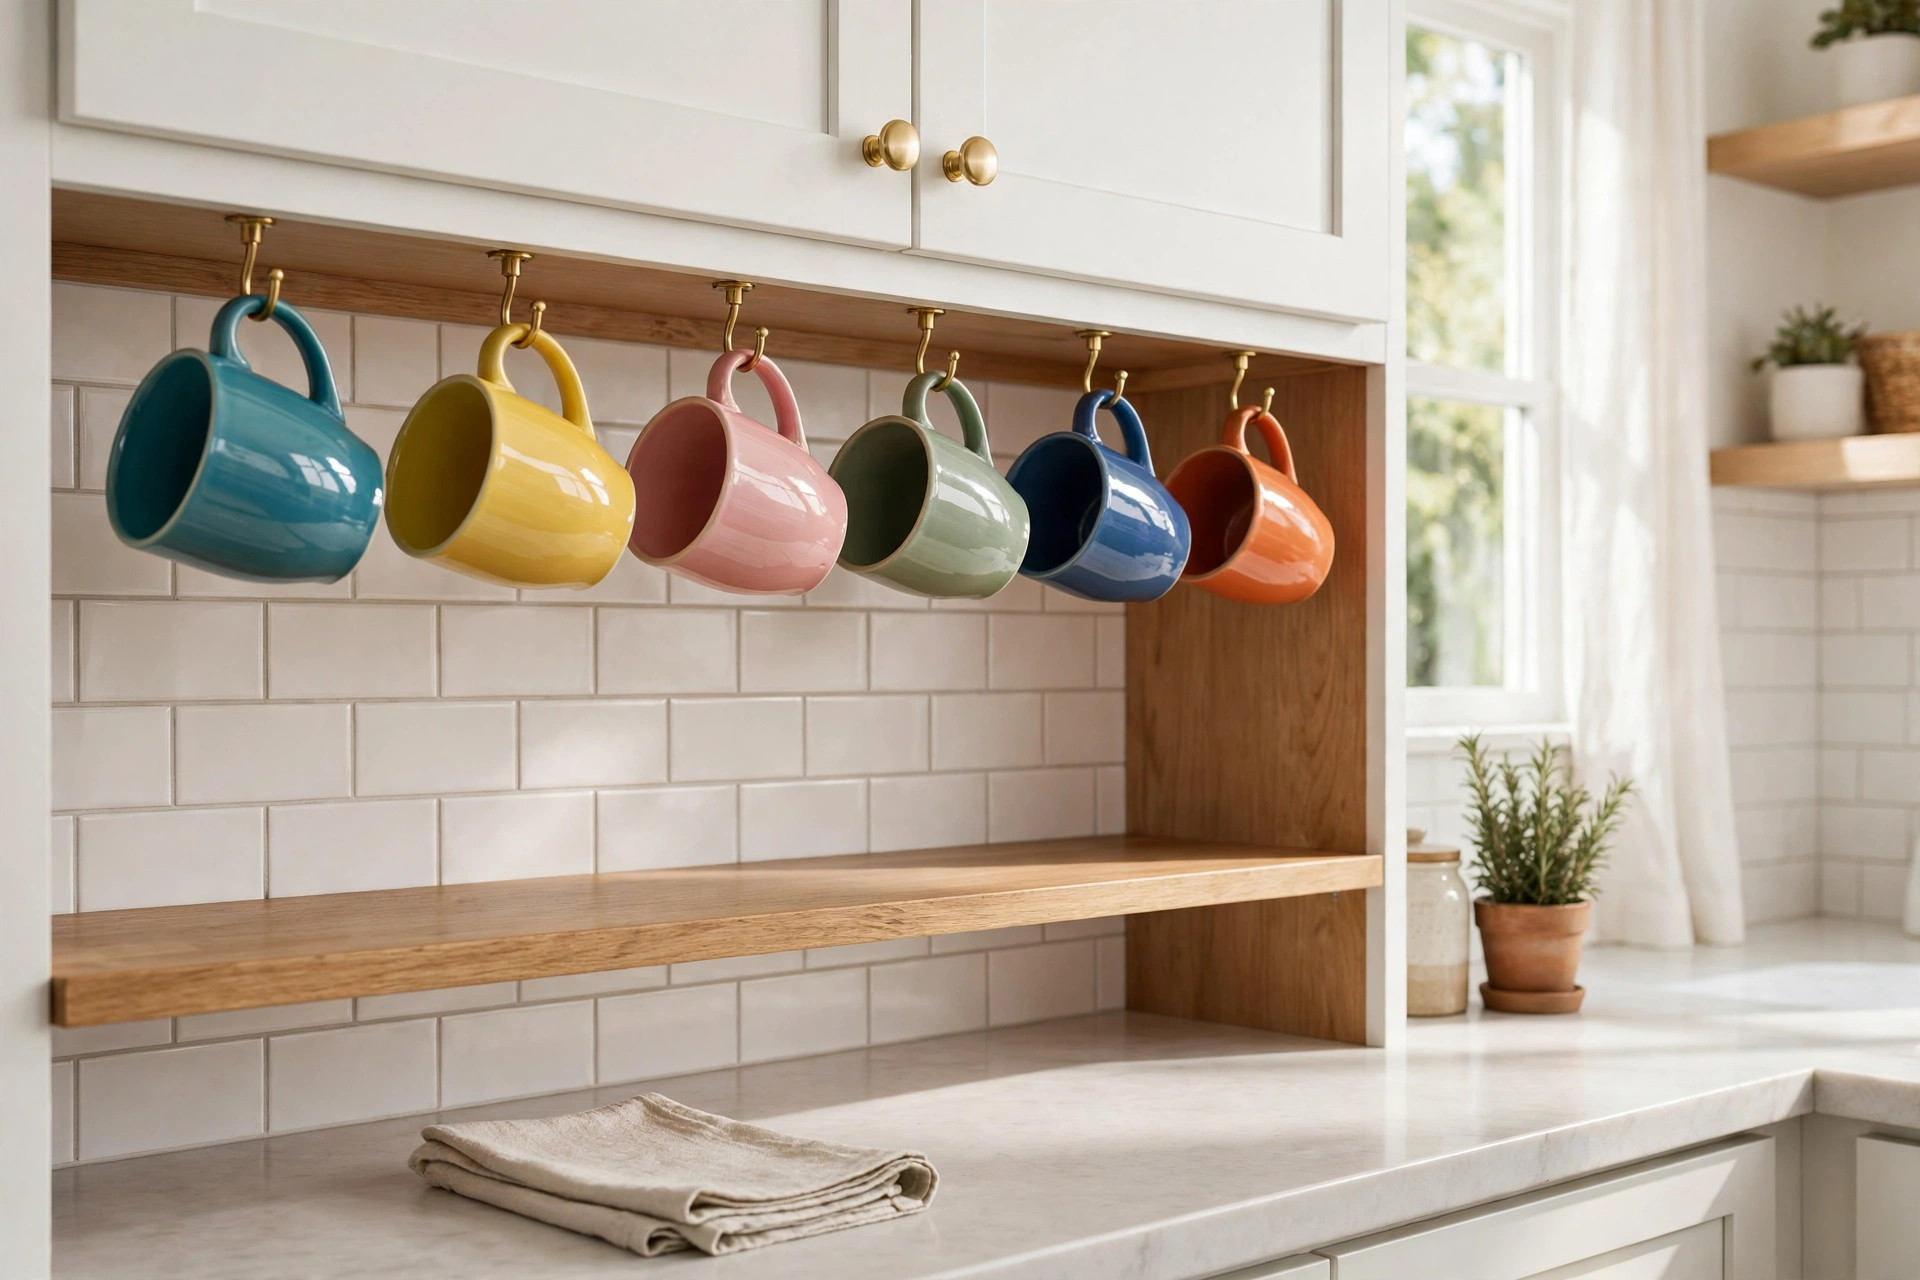
Mug hooks screwed into the underside of upper cabinets free up an entire shelf. I hung 8 mugs under one cabinet — they are visible, accessible, and take zero shelf space. Use cup hooks (the screw-in kind) spaced to avoid clinking. I put my everyday mugs here and store the fancy ones elsewhere. This works best if your cabinets have a solid wood underside (not particleboard). I tested one hook’s hold before doing all eight. My mug shelf is now a spice shelf. If you are a mug collector (no judgment), this is essential — mugs multiply like rabbits.
19. Use a Rolling Island for Extra Prep
A small rolling kitchen island adds prep space AND storage. Mine has a butcher block top, two shelves, and a towel bar — it holds my stand mixer (freeing counter space), extra pots, and cookbooks. I roll it against the wall when I need floor space, pull it out when I am cooking. It was $120, which felt like a lot until I realized it replaced a cabinet’s worth of storage. The wheels lock, so it is stable. If your kitchen is tiny, this is the best large investment. It is also great in rentals where you cannot renovate — it is furniture, not a fixture.
20. Label Everything
I resisted labeling because it felt obsessive. Then I labeled my pantry, fridge bins, and spice jars — and my husband could finally find things without asking me. Labels are not for you (you know where things go); they are for everyone else in the house. I use a simple label maker, but masking tape and a marker work fine. Label the shelf, not just the container, so when the container is empty, you know what goes back there. This is the step that makes organization stick long-term. Without labels, systems decay. With labels, even guests can put things away correctly.
21. Purge Before You Organize
The most important hack is not a product — it is getting rid of stuff. Before I organized, I purged: expired spices (17 of them), duplicate utensils, chipped mugs, gadgets I used once, plastic containers without lids. I filled two bags for donation and one for trash. Only then did I organize what remained. Organizing clutter just gives you neat clutter. Be ruthless: if you have not used it in a year, out it goes. The “one in, one out” rule maintains it — new gadget in, old gadget out. My kitchen has 30% less stuff now and functions 100% better. Less really is more.

22. Vertical Baking Sheet Storage
Store baking sheets, cutting boards, and cooling racks vertically using a tension rod or a dedicated organizer. I put a tension rod in a narrow cabinet to create a divider, and now my sheets stand upright like files. I can see and grab any one without moving the others. Before, they were stacked flat, which meant the bottom one was essentially inaccessible. This works in any cabinet at least 8 inches wide. The vertical file method (same as towels and clothes) is universal — if it is flat, store it vertical. I wish I had known this years ago.
23. Spice Drawer Instead of Spice Rack
I moved my spices from a countertop rack to a shallow drawer, laid flat with labels on the lids. I can see all 20 spices at once — no more spinning rack or digging through a cabinet. I used a simple drawer insert with angled tiers. The labels face up, so I read them without picking up each jar. This freed my entire countertop spice rack footprint. If you do not have a spare shallow drawer, the inside of a cabinet door with small shelves works similarly. The key insight: spices are used daily, so they deserve prime, visible real estate — not the back of a cabinet.
24. Over-Sink Dish Drying Rack
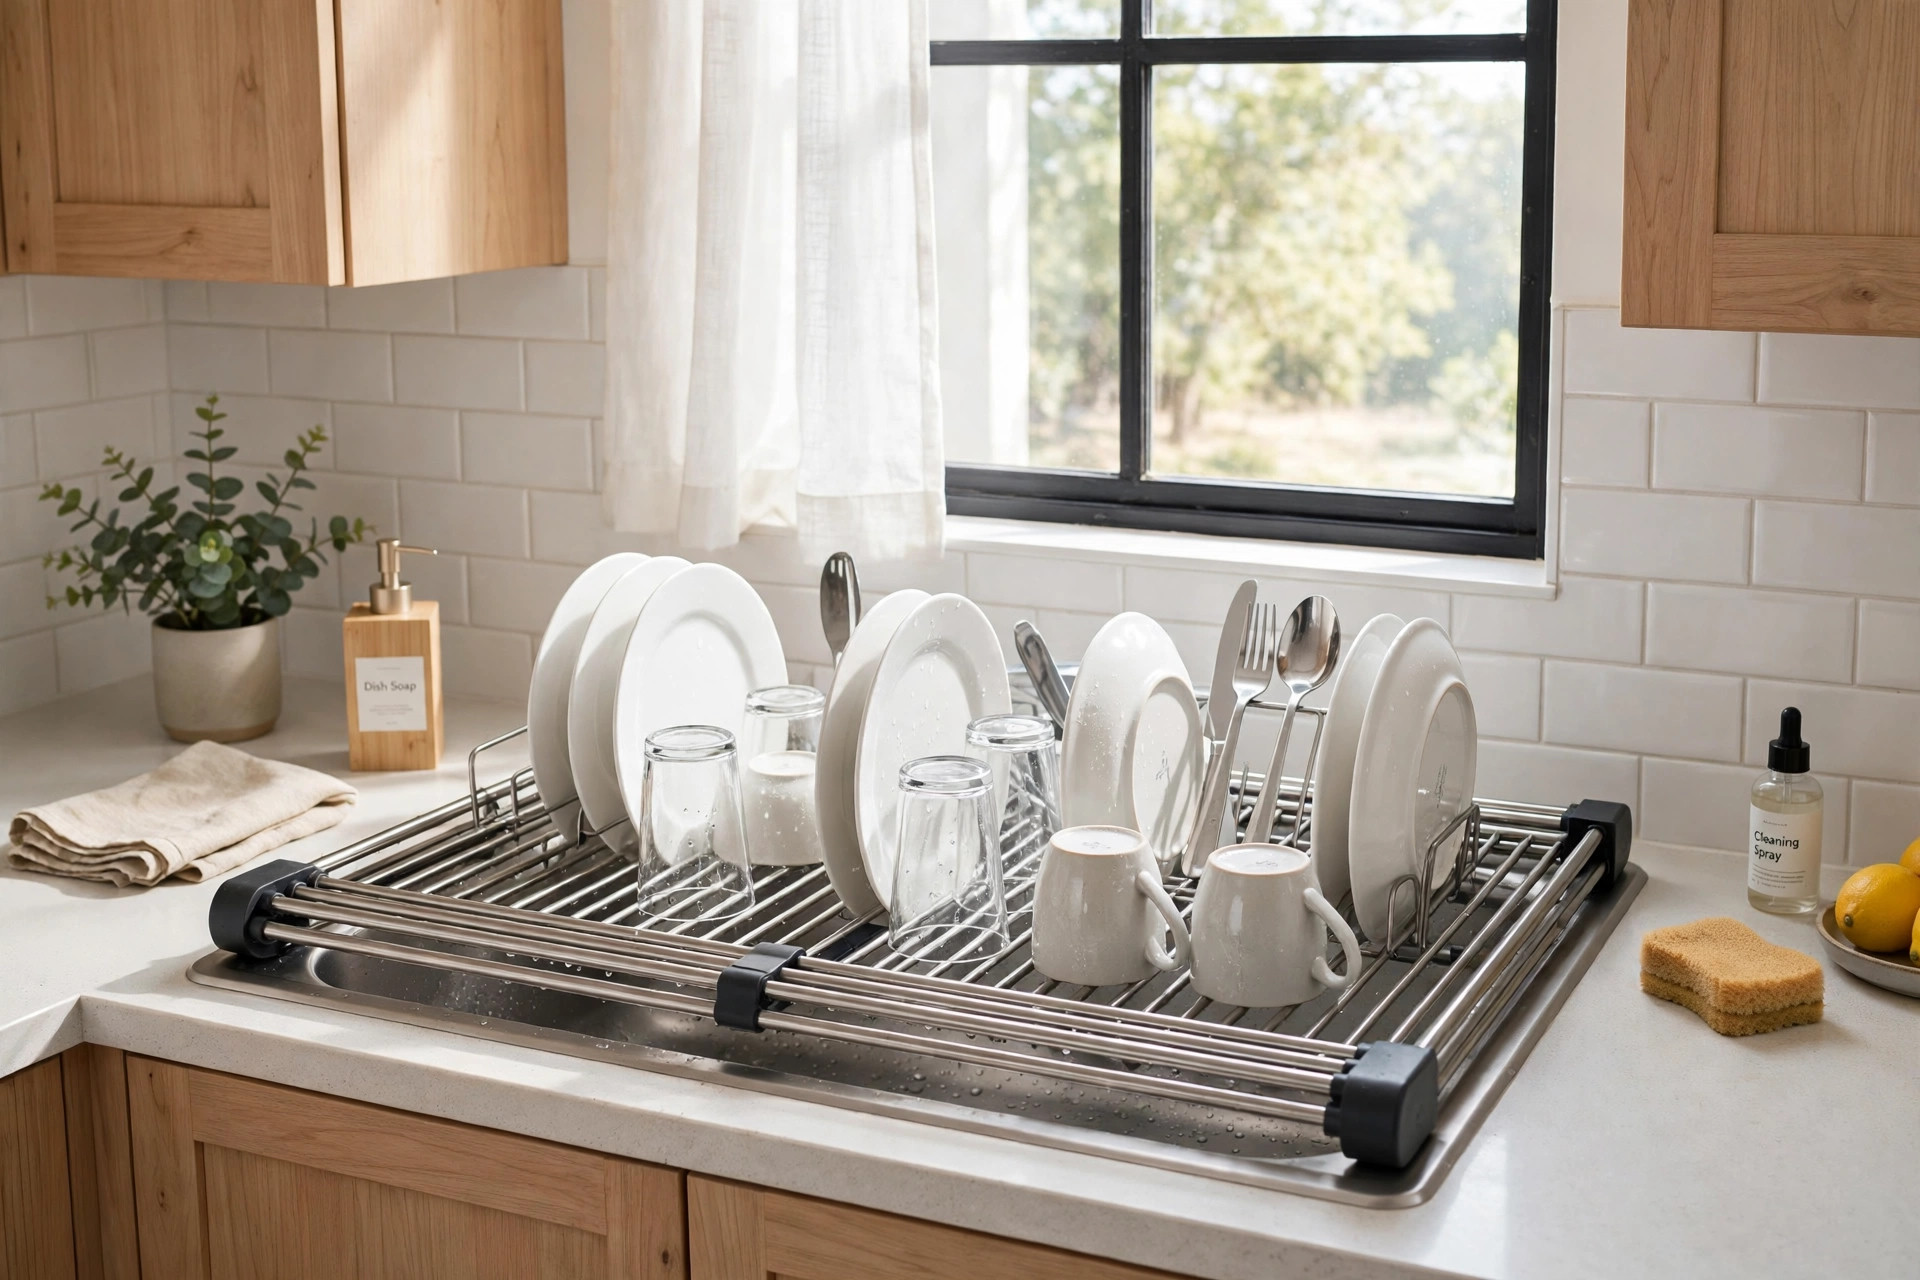
An over-sink roll-up dish rack (the silicone-coated steel ones) gives you a drying area that disappears when not in use. I roll mine out over the sink when I hand-wash, then roll it up and store it in a drawer. It holds dishes, cups, and utensils without taking any counter space. Before, my dish rack permanently occupied 2 square feet of counter. Now that space is free. It was $25. This is essential for small kitchens where counter space is gold. I also use it as a trivet for hot pots — it is heat-resistant.
25. Weekly 10-Minute Reset
Organization is not a one-time project — it is a habit. Every Sunday, I spend 10 minutes resetting my kitchen: put things back where they belong, toss expired items, wipe one shelf. It prevents the slow decay that turns organized kitchens back into chaos. I set a timer — 10 minutes, no more. It is usually enough because I am just maintaining, not reorganizing. This is the hack that makes all the other 24 hacks stick. Without maintenance, even the best system falls apart in a month. With a weekly reset, my kitchen has stayed organized for over a year. Ten minutes a week is the real secret.
Styling Tips
- Purge first, then organize. Buying containers for clutter you do not need is just expensive hoarding.
- Measure your cabinets, drawers, and shelves before buying any organizer — “standard” sizes are not standard.
- Start with the area that frustrates you most (for me, it was the spice situation). One win motivates the next.
- Use clear containers and labels — visibility is the foundation of every system that lasts.
- Group by where you use things (zones), not by category. Coffee stuff by the coffee maker, not in the pantry.
- Do a 10-minute weekly reset. Organization without maintenance is just a temporary project.
Frequently Asked Questions
How do I organize my kitchen with no pantry? Use vertical space (wall-mounted shelves, over-door organizers), clear bins on open shelves, a rolling cart as a mobile pantry, and the inside of cabinet doors. Decant dry goods into stackable containers. A small kitchen without a pantry needs every inch working — go up, use doors, and purge ruthlessly.
Where should I store things in a small kitchen? Follow the work zones: prep tools near the prep area, cooking oils and spices near the stove, dishes near the dishwasher/sink, cleaning supplies under the sink. Daily-use items at eye level and within arm’s reach; occasional items high or low. The most-used items earn the best spots.
What are the best kitchen organization products? The highest-impact basics: clear airtight containers, drawer dividers, shelf risers, a lazy Susan for deep cabinets, tension rods, and labels. You do not need expensive systems — these six items (under $100 total) solve 80% of kitchen chaos. Buy after measuring, not before.
How do I declutter my kitchen counters? Remove everything, then only put back what you use daily (coffee maker, knife block, fruit bowl — your personal top 3). Everything else gets a home in a cabinet, drawer, or on the wall. Create a “landing zone” outside the kitchen for mail and keys. If an appliance has not been used in a month, store it elsewhere.
Final Thoughts
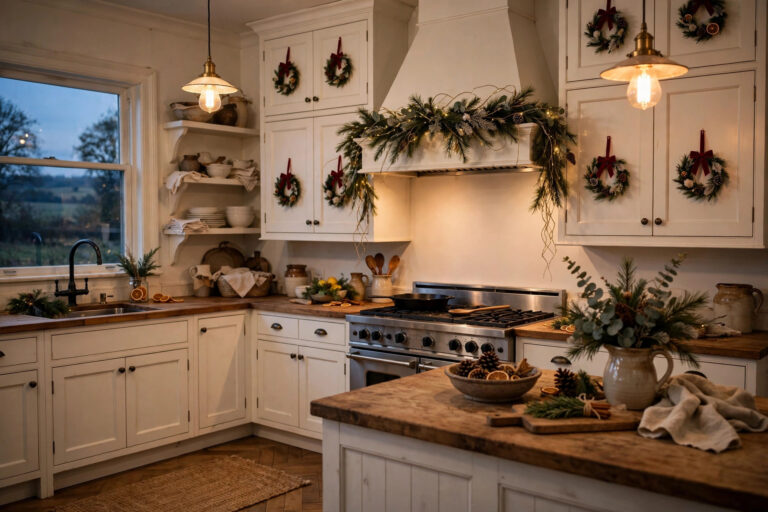
An organized kitchen is not about having the prettiest pantry on the internet — it is about making your daily life easier. These 25 hacks took my kitchen from stressful to serene, and most of them cost less than a takeout dinner. Start with the one that addresses your biggest frustration, then keep going. Your future self, cooking dinner without digging through chaos, will thank you. Once everything has a home, dress it up for December with these Christmas kitchen decor ideas.