25 DIY Craft Projects for Beginners to Make at Home
The best beginner craft is one you can finish in a single sitting, with supplies that cost less than a takeaway coffee. Nothing here asks for a kiln, a sewing machine, or prior experience — just paper, glue, beads, yarn, and an hour or two. Pick the project that matches what you already own, and let the finished piece convince you to try the next one.
All 25 projects below teach a real skill (cutting, knotting, threading, molding) while producing something usable or giftable. Start simple, finish often, and don’t chase perfection on the first attempt.
1. Paper Flowers
Tissue or crepe paper, scissors, and glue turn into peonies, roses, or wildflower sprays that never wilt. A single bloom takes about 20 minutes once you learn the petal rhythm, and a full bouquet costs less than a grocery-store bunch.
The craft ofpaper craftssharpens cutting and folding while you play with color and shape. Layer the petals, curl the edges around a pencil, and wire the stems — beginners get impressive arrangements with minimal tools and zero maintenance afterwards.

2. Beaded Bracelets
Elastic cord and a mixed bag of beads (about $8–$12 for enough to make a dozen bracelets) teach threading and pattern design in one sitting. Start with a simple single strand, then try layering lengths or mixing bead sizes once the knotting feels natural.
They make excellent gifts because sizing is forgiving — measure the wrist, add an inch, and the elastic does the rest. Tie the knot, dab it with clear nail polish, and tuck it inside a bead so it never snags.

3. DIY Keychains
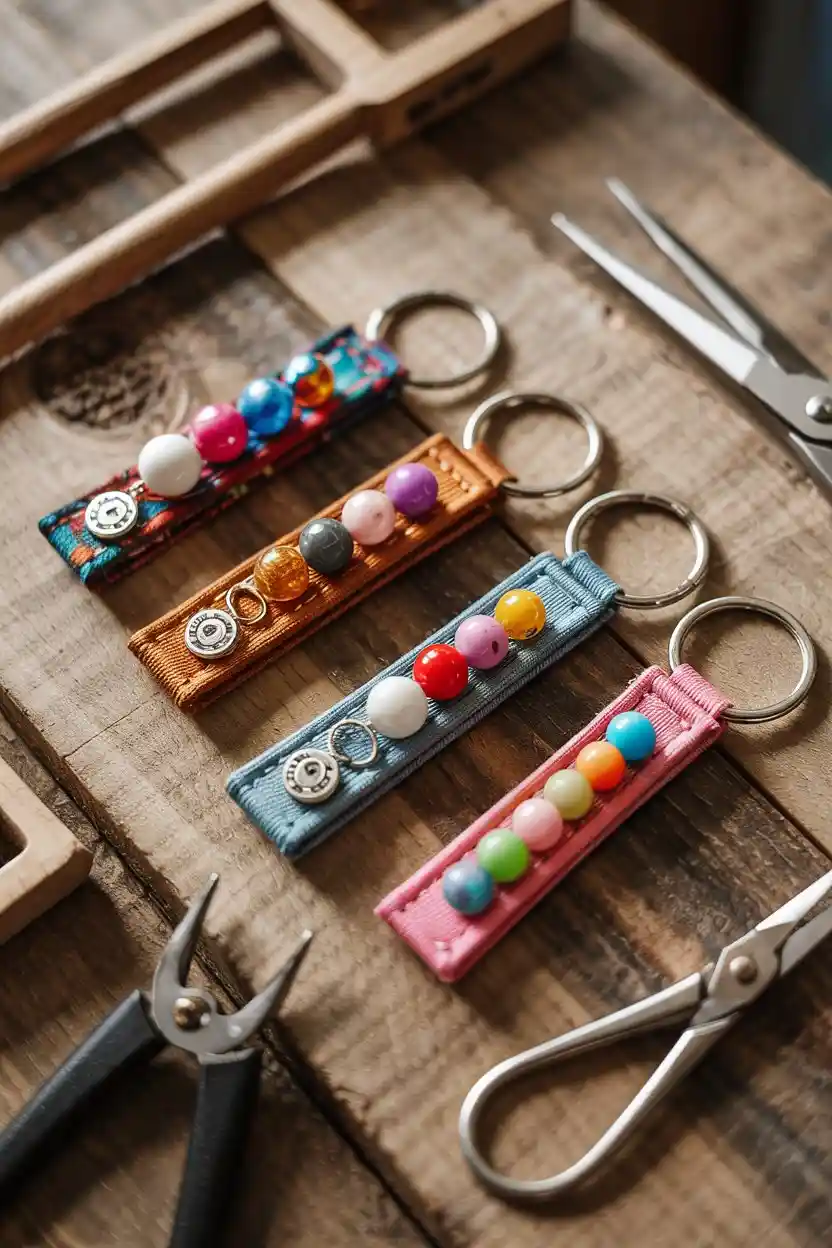
Shrink plastic, wooden beads, fabric scraps, or leather offcuts all become keychains with character. Shrink plastic is the crowd-pleaser: draw, cut, bake for two minutes, and watch the piece shrink to a third of its size and thicken into something sturdy.
Cutting, gluing, and threading in one small project builds real confidence fast, and the result rides along on your keys every day. Make a batch — they’re the easiest handmade gifts you’ll ever produce.
4. Yarn Wall Hanging
A wooden dowel, cotton yarn in three or four tones, and basic lark’s-head knots make a textured wall piece in an evening. No weaving experience needed: wrap, knot, trim the ends into a V or straight edge, and hang.
Varying yarn thickness and length gives the piece depth that flat prints can’t match. Keep the width around two-thirds of the furniture below it and the whole thing looks professionally styled.

5. Handmade Bookmarks
Heavy cardstock, stamps, markers, or pressed flowers become bookmarks people actually use. Cut to roughly 2 × 6 inches, round the corners, and punch a hole for a ribbon or tassel — the whole project takes under 20 minutes.
Laminate them or seal with clear packing tape so they survive years inside books. A set of four tied with twine is a thoughtful, nearly free gift for any reader.

6. Macrame Plant Hanger
Three basic knots — lark’s head, square knot, and gathering knot — are the entire vocabulary of a plant hanger. About 30 feet of 4 mm cotton cord (under $10) makes a hanger for a 6-inch pot in one focused afternoon.
Tension control is the skill: keep every knot equally snug or the hanger twists. The payoff is high — a handmade hanger elevates a plain pot into a styled corner instantly.

7. Painted Mason Jars
Acrylic paint, a foam brush, and twine turn mason jars into vases, candle holders, or bathroom storage. Thin the paint slightly and apply two light coats rather than one thick one to avoid brush marks and drips.
Sand the glass lightly first and wipe with rubbing alcohol so the paint bonds; seal with a clear matte spray for pieces that will be handled. Match the palette to the season and the same jar works year-round.

8. Clay Trinket Dish
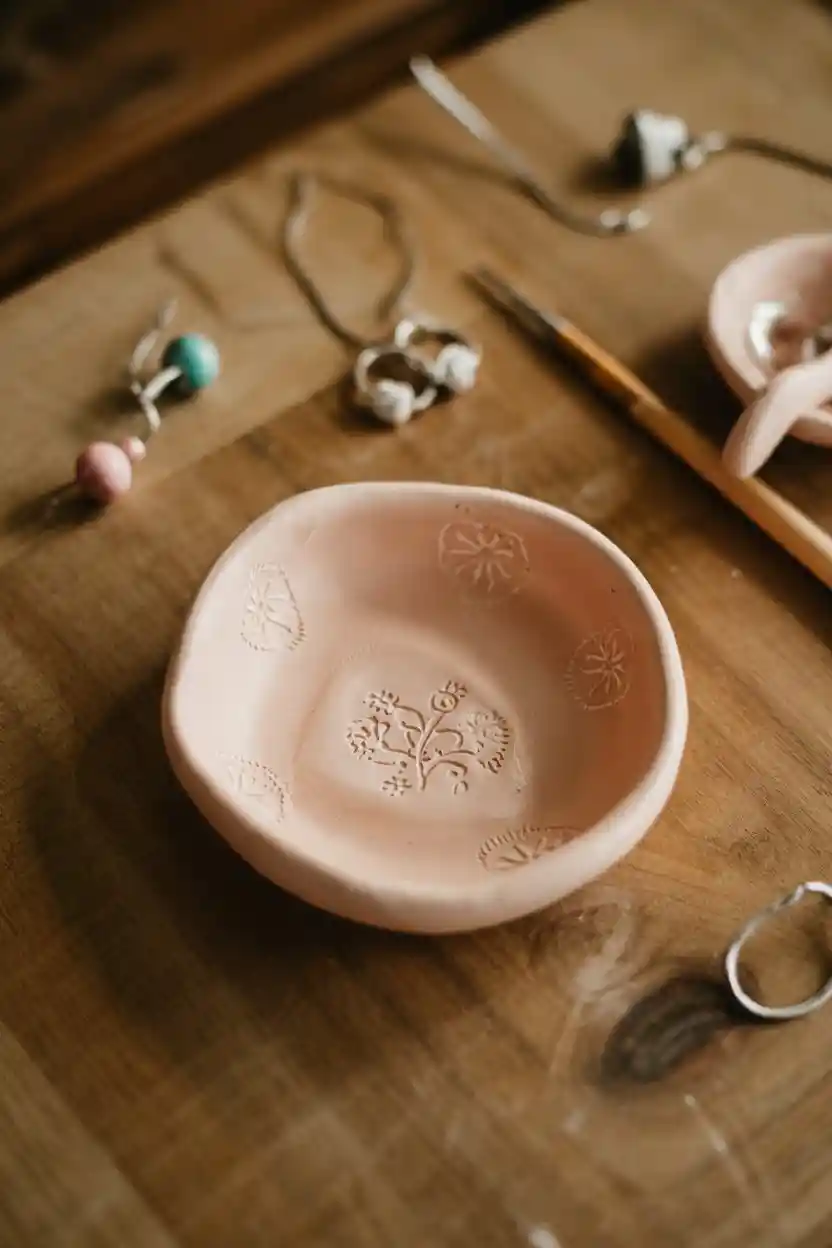
Air-dry claytrinket dishes are forgiving to shape andeasy to personalize, ideal for a first encounter with the material. Press a slab about 6 mm thick into a small bowl as a mold, trim the edge, and let it dry 48 hours before painting.
Stamp a pattern with lace or a carved potato while the clay is soft, then paint and varnish once dry.Clay workis deeply tactile — kneading and smoothing quiets a busy mind — and you finish with a dish that actually holds rings and keys by the door.
9. Toilet Paper Roll Organizer
Glue empty rolls upright inside a shallow box or tray, then wrap the whole thing in decorative paper or paint. The honeycomb holds pens, brushes, cables, and makeup with surprising sturdiness for something headed to recycling.
Cut some rolls to half height for shorter items so everything stays visible. It’s free, takes an hour, and teaches the core of upcycling: seeing structure in scrap.

10. Fabric Scrap Coasters
Glue or stitch fabric squares onto cork or felt bases cut to 4-inch rounds or squares. Pinking-sheared edges or a simple running stitch around the border stops fraying and looks intentional.
A set of six uses up the smallest remnants and protects the table in the bargain. Mix patterns within one color family and the set reads as designed, not leftover.

11. Greeting Cards
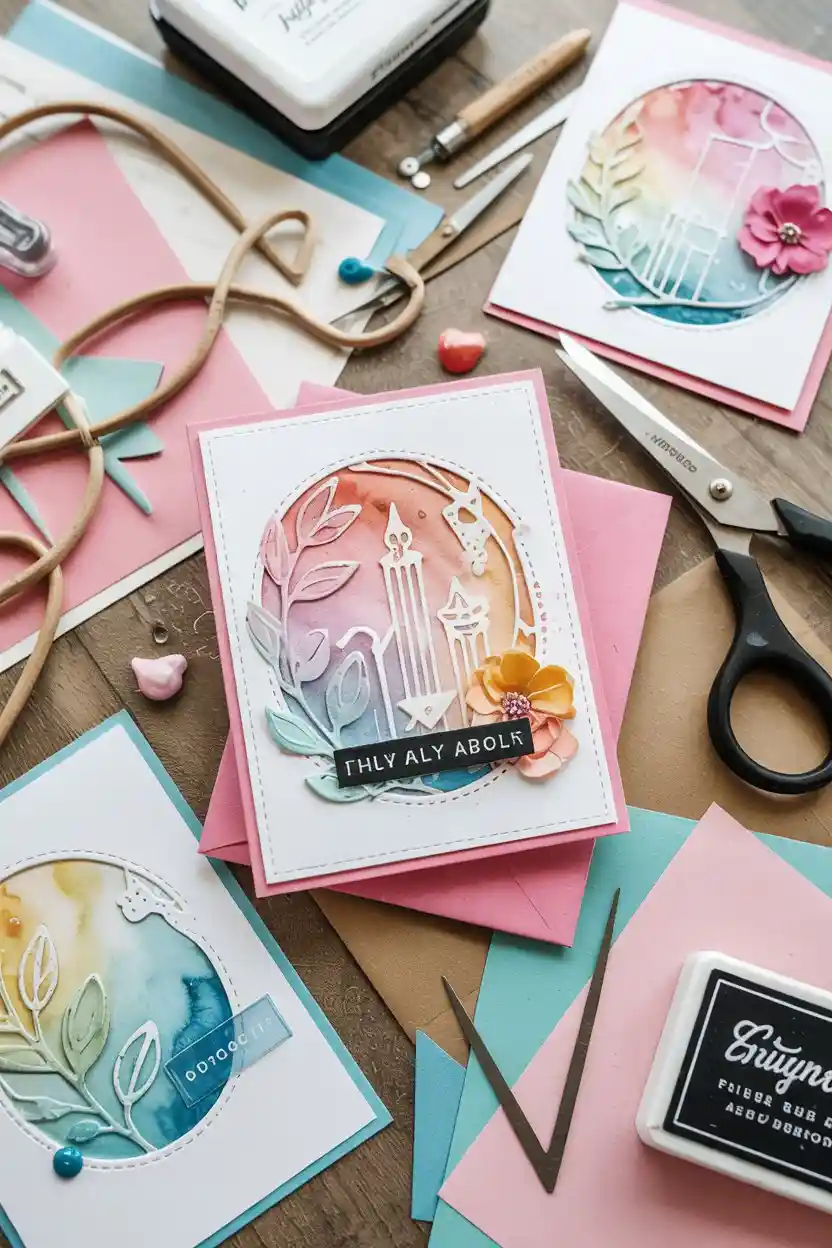
A stack of blank card bases, stamps or collage scraps, and a glue stick are a card for every occasion you’ll ever need. Score the fold with an empty ballpoint first — crisp folds separate handmade from homemade-looking.
Write the message before decorating around it, so the sentiment gets the space it deserves. People keep handmade cards for years; the five-dollar store kind gets recycled by February.
12. Popsicle Stick Frame
Glue craft sticks into a square or rectangle, overlapping the corners for strength, then paint or decoupage. A 4 × 6 photo needs sticks laid about 5 × 7 inches; clamp with rubber bands while the glue sets.
Paint before assembly to avoid fiddly corners, and add small embellishments — buttons, dried flowers — sparingly. Kids can do this one alongside adults with zero frustration.

13. Paper Lanterns
Accordion-folded or cut-and-curled paper around a battery LED tea light gives a soft glow with none of the fire risk. Use vellum or thin colored paper so the light diffuses, and keep real candles far away from every version of this project.

14. Pebble Magnets
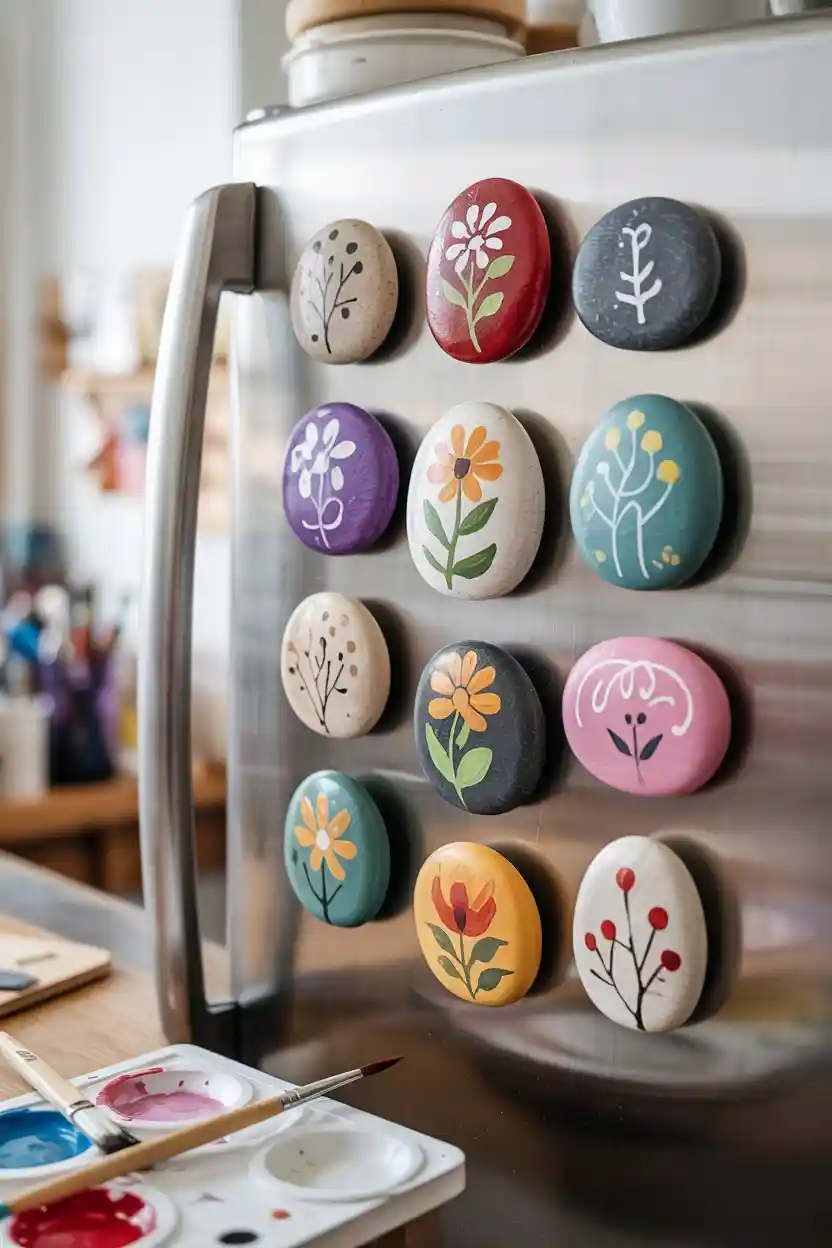
Smooth flat pebbles, acrylic paint, and small magnets glued to the back become fridge art in under an hour. Paint a base coat of white first so colors pop, seal with varnish, and use a strong craft glue — weak glue means magnets that slide off by morning.
15. Tassel Accessories
Wrap yarn or embroidery floss around a 3-inch card about 30 times, tie off the top, cut the bottom loop, and trim — a tassel in five minutes. It’s a quick, satisfyingembroidery basicworth knowing. Hang them on keyrings, zipper pulls, or bookmarks, varying length and fullness for different looks.

16. Painted Rocks
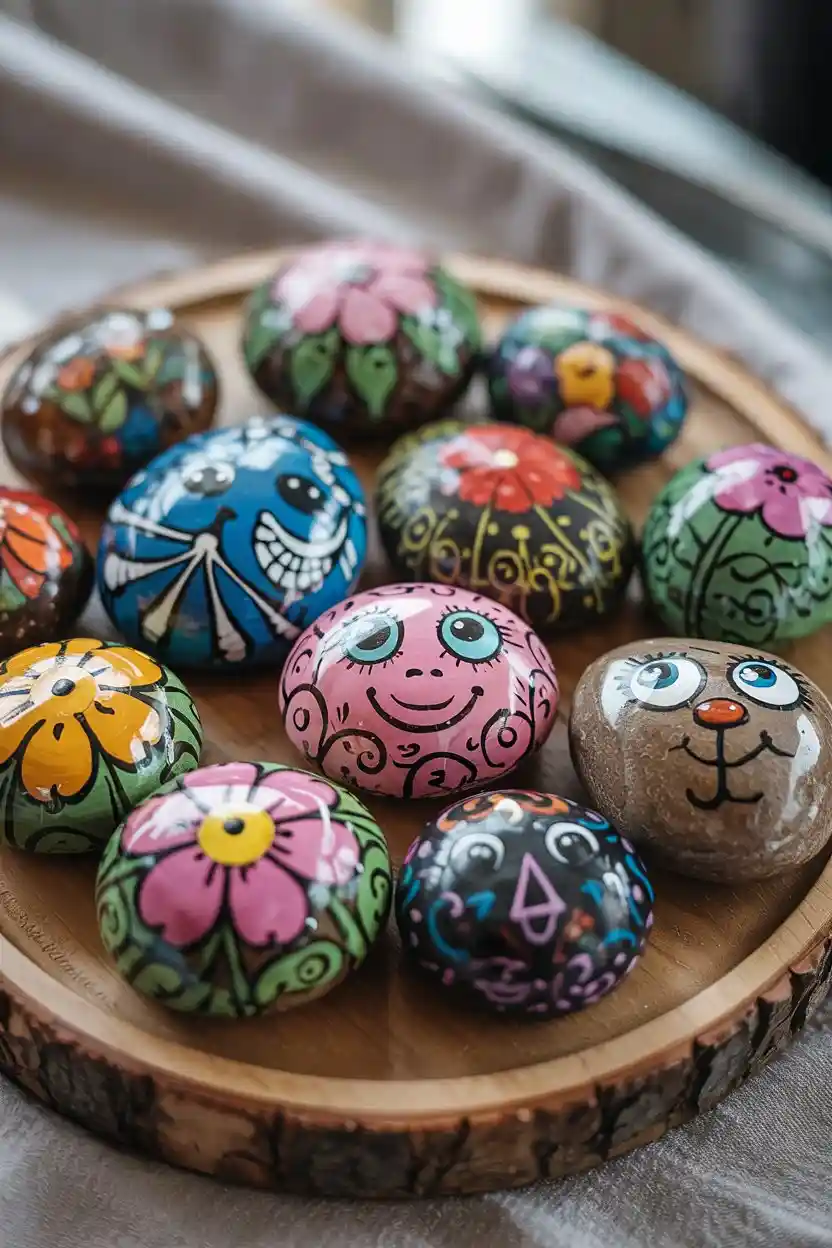
Flat smooth stones, acrylic paint pens (far easier than brushes for detail), and a clear sealer become garden markers, paperweights, or hidden-and-found gifts. Paint pens give beginners crisp lines without brush control.
17. Ribbon Bows
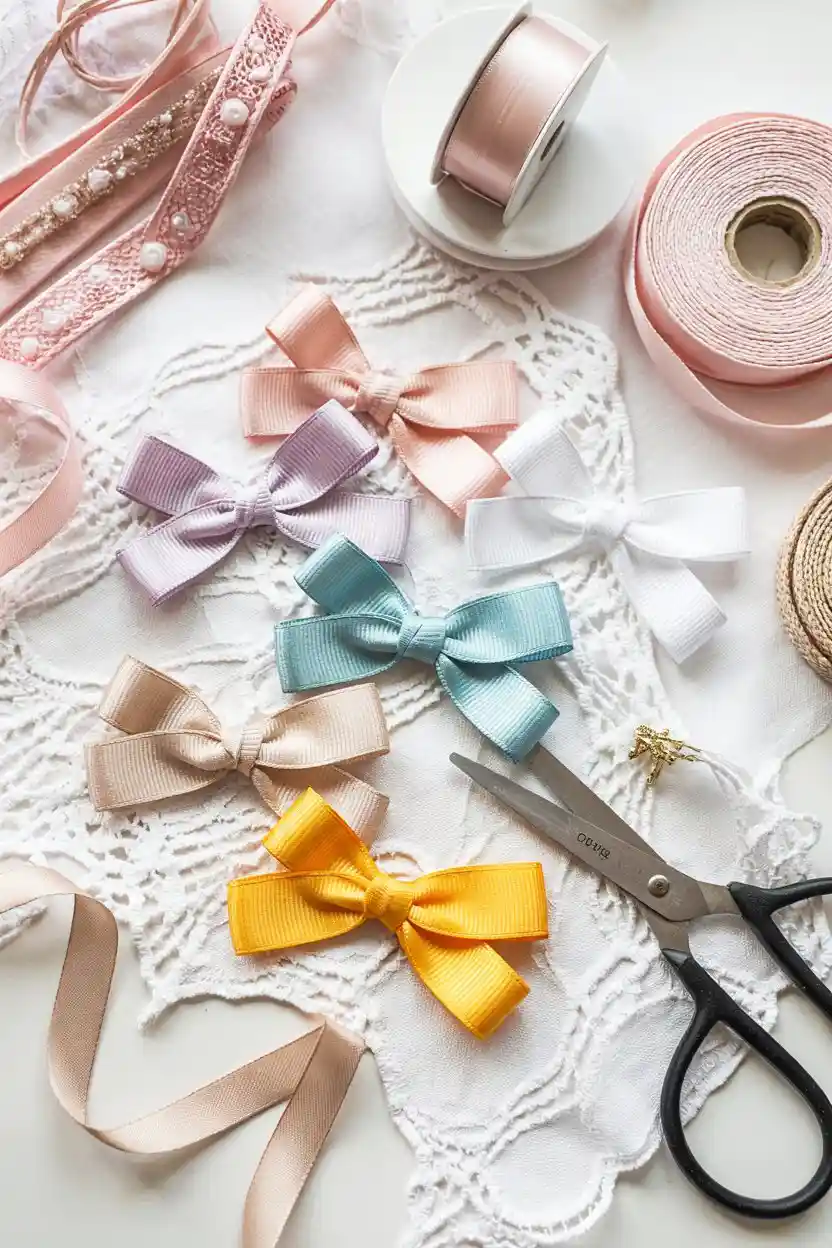
Wired ribbon holds its shape; non-wired ribbon needs a stitch or glue dot at each loop. The florist’s trick: make two loops, pinch the center, wrap with thin wire, then fluff — a full bow in under two minutes that upgrades any gift or hair tie.
18. Paper Wall Art
Cut geometric or botanical shapes from colored cardstock, layer them with foam dots for dimension, and frame. Working in one color family with varied textures — matte, metallic, vellum — looks strikingly professional for the price of a paper pack.

19. Handmade Soaps
Melt-and-pour glycerin base (about $15 for two pounds) melts in the microwave; stir in skin-safe colorant and fragrance at under 140°F, pour into silicone molds, and unmold in a few hours. Dried lavender buds or oatmeal folded in look and feel luxurious.

20. Bottle Cap Magnets
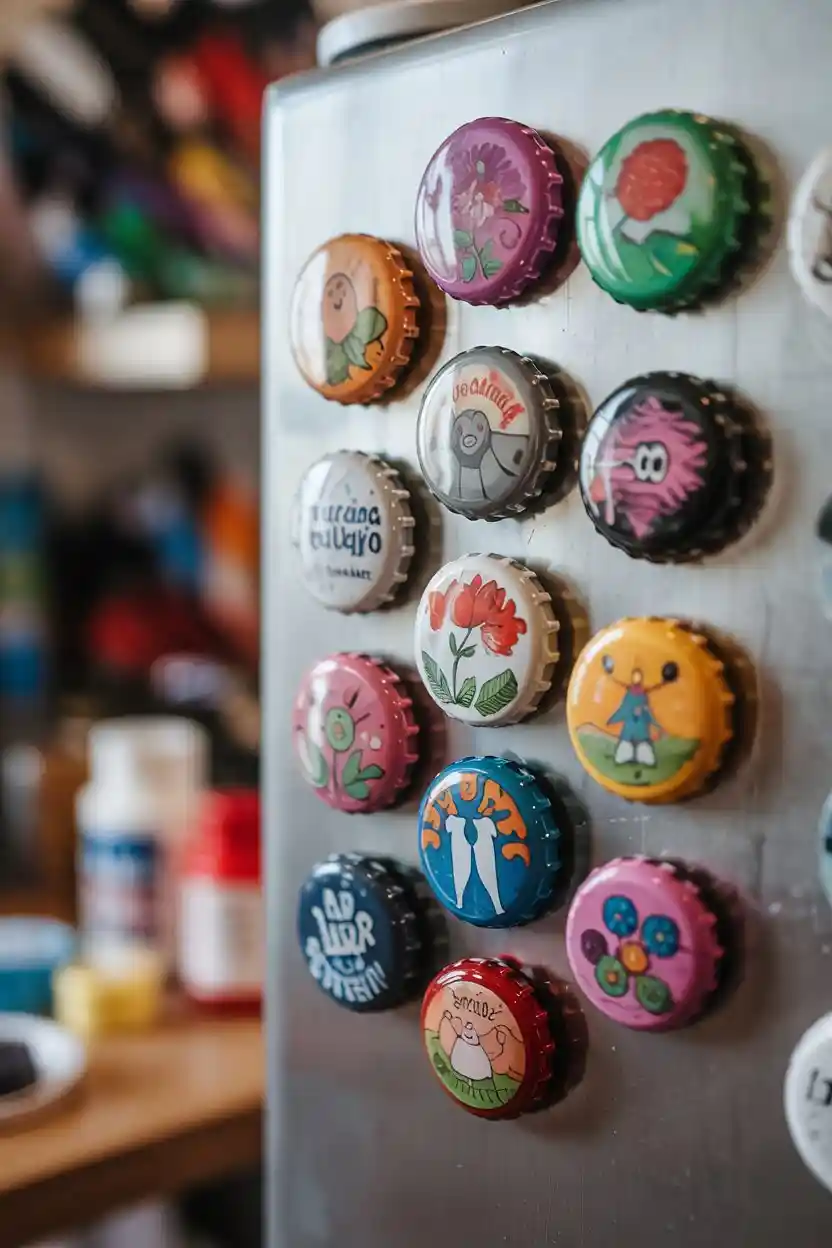
Flatten the crimped edge of metal bottle caps with pliers, fill with a tiny photo or painted design, dot with clear resin or dimensional glue, and back with a magnet. A tray of them costs almost nothing and personalizes a fridge instantly.
21. Button Jewelry
String vintage or novelty buttons on elastic or wire for bracelets and necklaces with real character. Mix sizes but keep the color story tight — all cream, all denim blue — and the result looks curated rather than craft-box random.

22. Tote Bag Decoration
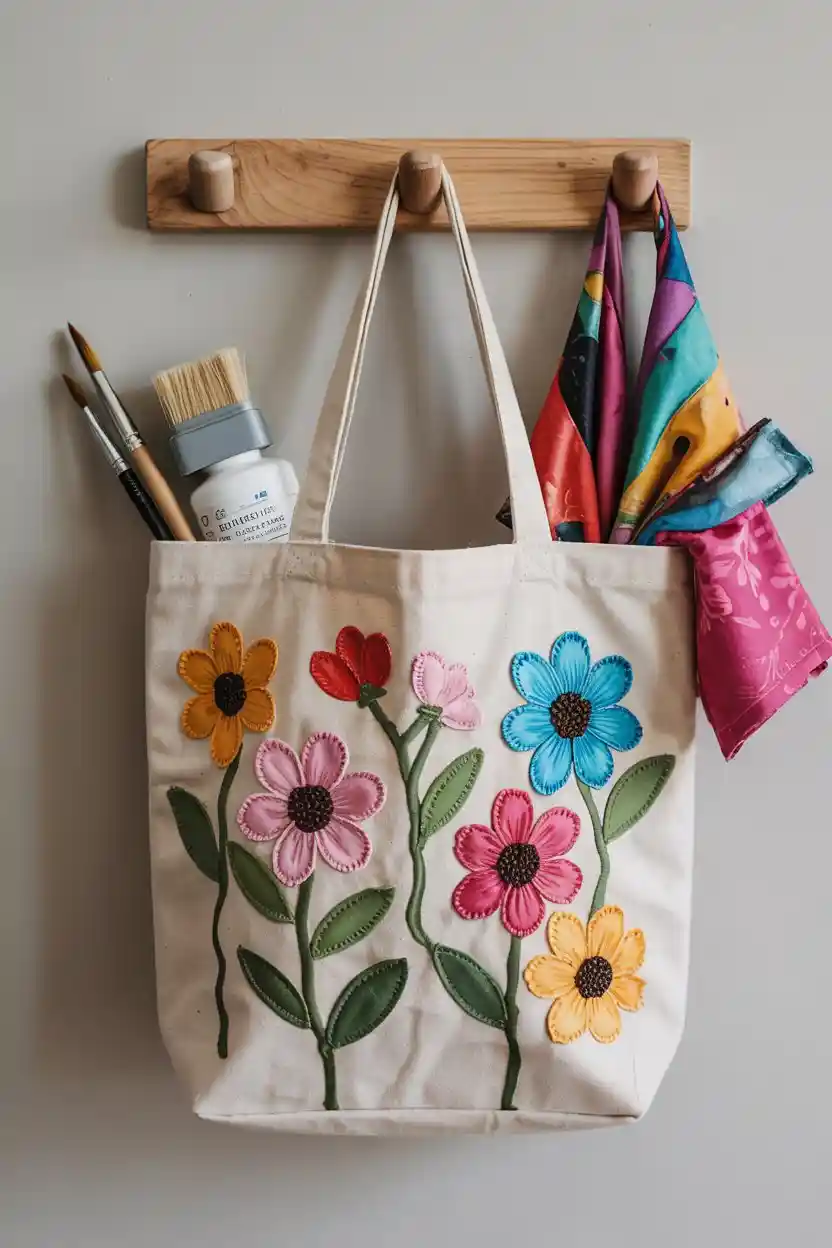
Fabric paint or iron-on appliqués turn a plain canvas tote into a personal statement. Slip cardboard inside the bag before painting so nothing bleeds through, heat-set the paint with an iron, and the design survives the washing machine.
23. Candle Holders
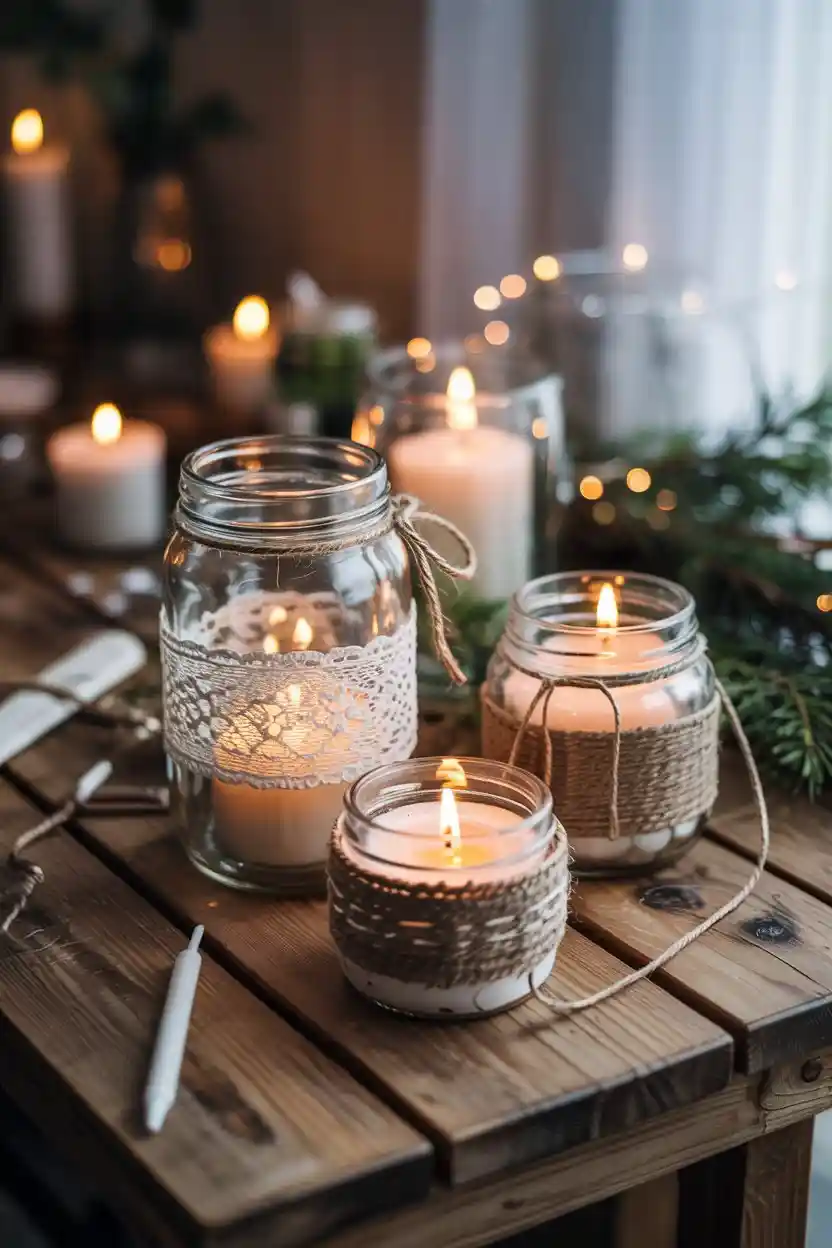
Paint, lace, or twine on glass jars makes candle holders with real atmosphere — but always use LED candles inside decorated glass, never open flame near fabric or dried embellishments. Frosted glass spray gives an expensive diffused glow for a few dollars.
24. Paper Quilling
Roll 3 mm paper strips around a quilling needle or toothpick into tight or loose coils, then pinch into teardrops, eyes, and hearts. A starter kit with strips and a needle costs under $10; a simple flower card takes about an hour once the rolling rhythm clicks.

25. Gift Boxes
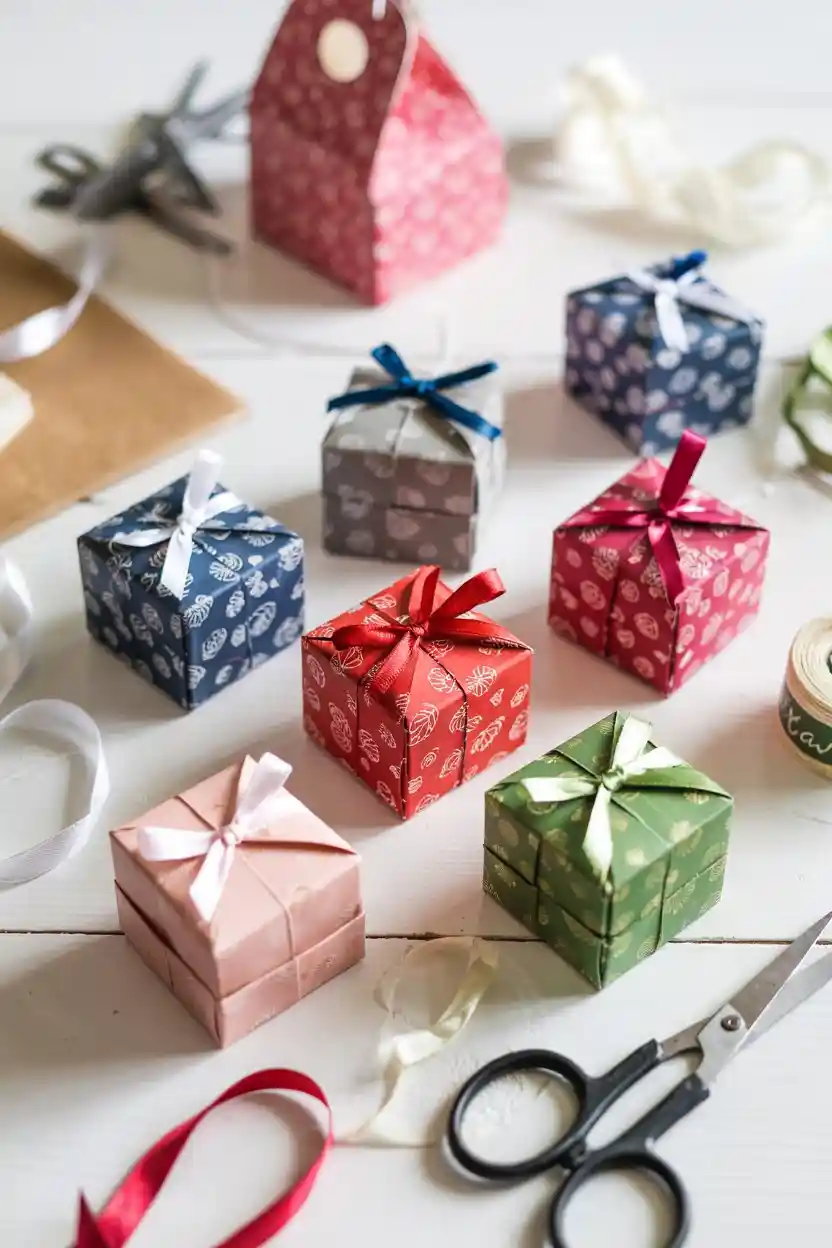
A printed template, cardstock, and a bone folder produce crisp lidded boxes sized for jewelry or sweets. Score every fold line before folding, use double-sided tape on the tabs for invisible seams, and the box becomes part of the gift.
FAQs for DIY Craft Projects