Introduction
Every December, my tree tells the story of every year I have spent with a hook in my hand. Some ornaments are a bit lopsided, a few have lost a button eye over the years, and one angel leans permanently to the left — but I would not trade a single one for a shop-bought set. If you are hunting for a crochet ornaments free pattern to start your own handmade tree, you have come to the right place. These 21 free crochet Christmas ornament patterns cover everything from classic baubles and tiny stockings to snowmen, reindeer, and personalized initials, and every single one is beginner-friendly enough to finish in an evening or two. I have made most of them myself, some more than once, and I will tell you honestly which ones are quick wins and which ones need a little patience. Grab your worsted weight yarn, a 4mm hook, and let’s make a tree worth remembering.
1. Classic Red-and-White Striped Baubles
There is no better starting point than a simple striped bauble. You work in continuous rounds of single crochet, switching between red and cream every two rounds, then stuff lightly and close up the top. I made my first set from Red Heart Super Saver because it holds its shape and costs almost nothing, and honestly, they still look great five years on. The trick is keeping your tension even so the stripes line up instead of spiralling — I mark the start of each round with a stitch marker, which saves a lot of frogging. Hang them with a loop of thin ribbon, and they instantly look like something from a country Christmas catalogue. If you have never crocheted in the round before, this is the pattern that teaches you.
What you need
Red and cream worsted weight yarn, a 4mm hook, a little polyester fiberfill, and ribbon for hanging.
2. Amigurumi Mini Stockings
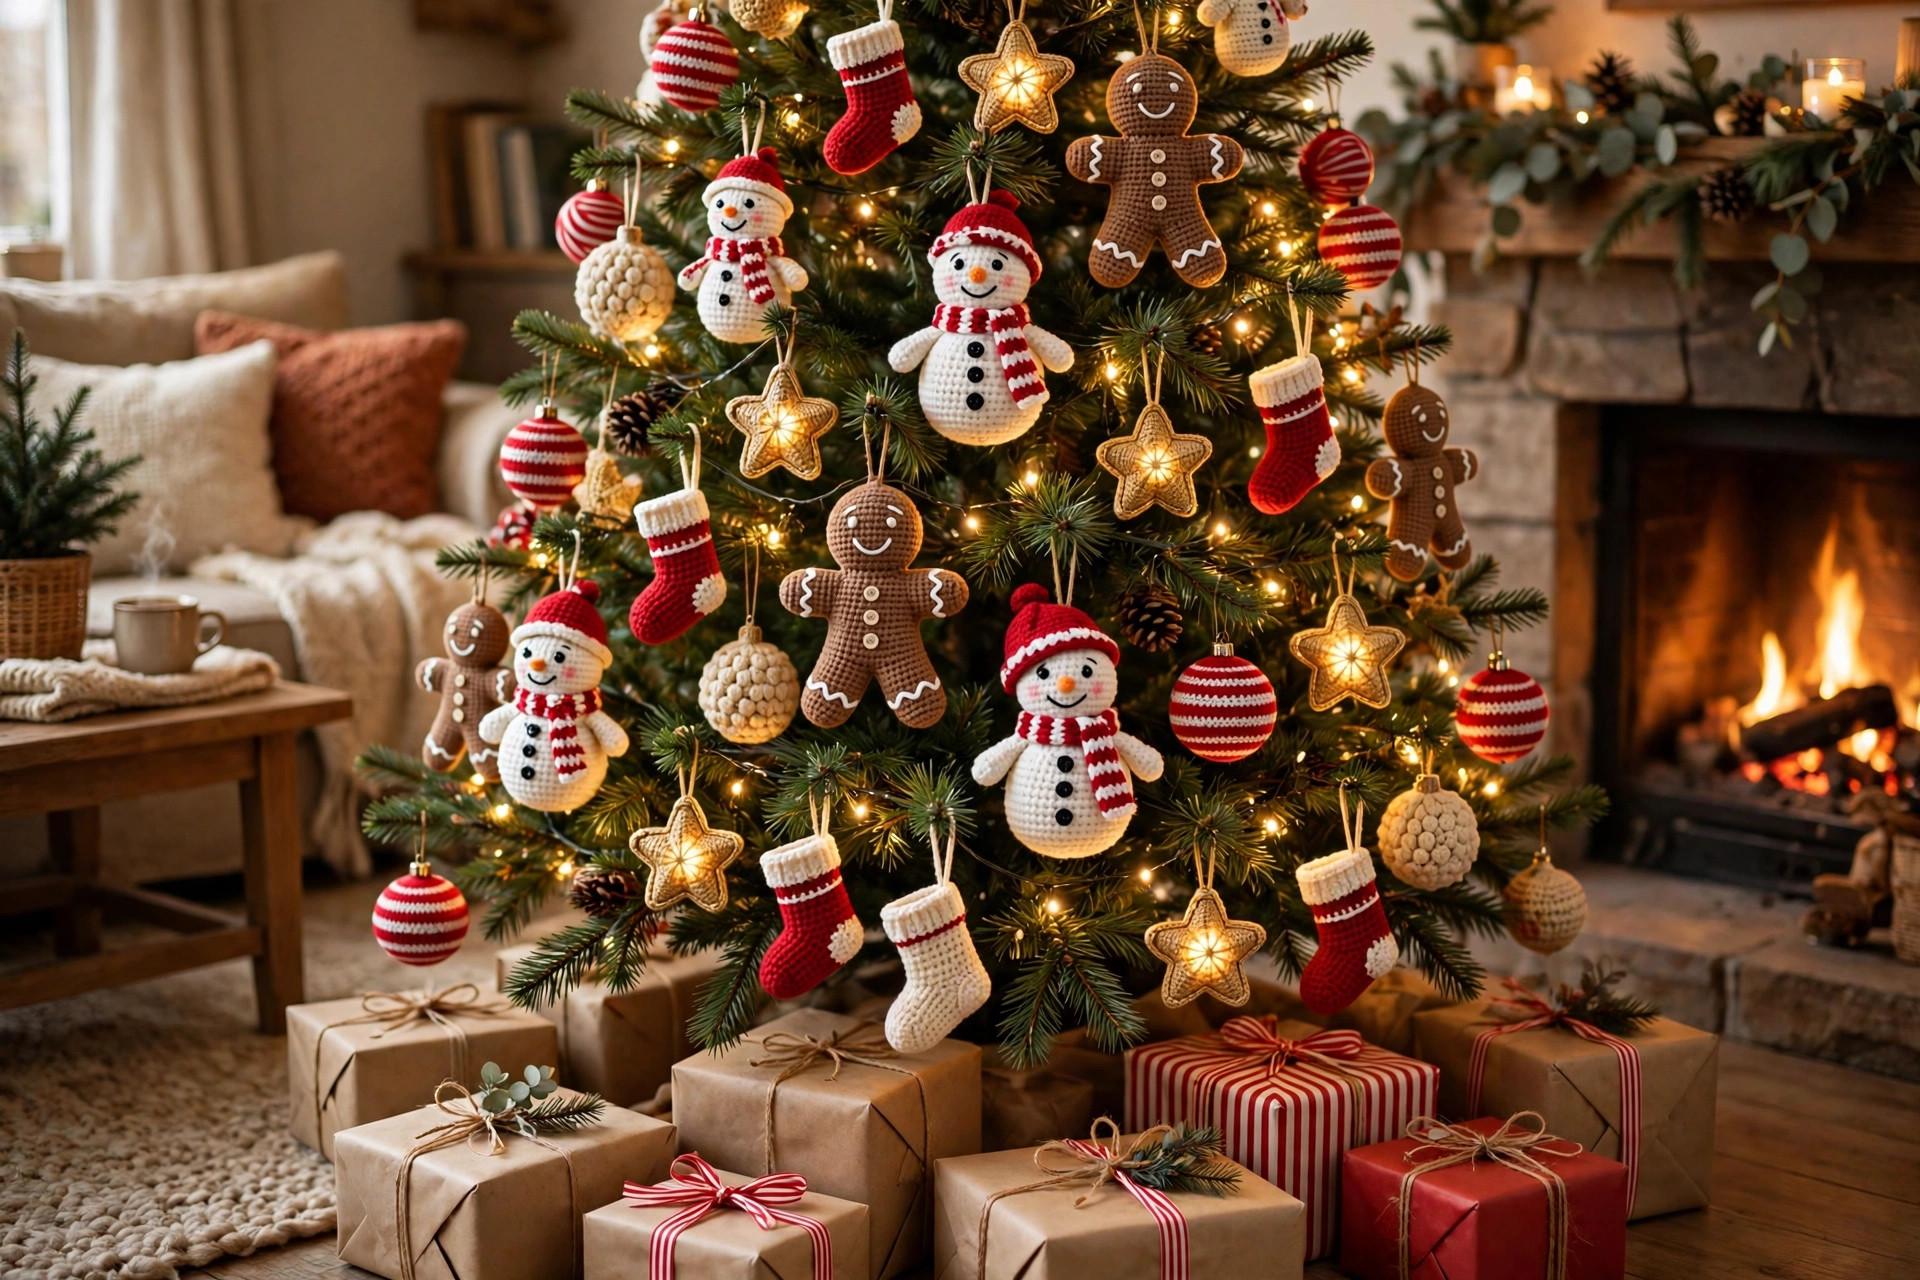
Tiny stockings are the ornaments my guests always pick up first. You start at the toe, work up the foot, then turn a proper little heel — it sounds fiddly, but the heel is just short rows, and once you have done one, the rest fly by. I stuff mine very lightly so they keep a soft, floppy shape, and I add a white cuff in a fluffy yarn for that knitted-by-grandma feel. My daughter insists on one new stocking on the tree every year with her initial stitched on, so our collection is slowly taking over the lower branches. They also make sweet gift toppers: tuck a chocolate coin inside and tie one to a present. For a full set of DIY Christmas ornament ideas beyond crochet, I keep a whole list of no-sew options too.

3. Granny Square Snowflakes
Granny square snowflakes look far more complicated than they are. You are basically making a small granny square, then working a round of picot points and chain loops around the edge to suggest snowflake arms. I use white or pale blue cotton yarn for these because cotton blocks beautifully — and blocking matters here. My first batch curled up like potato chips until I learned to pin each snowflake out on a foam board, spritz it, and let it dry overnight. The difference is night and day. They weigh almost nothing, so they hang beautifully on the thinnest branches, and a set of six in different sizes looks like a proper snowfall across the tree. Make them in sparkly yarn if you want a little glitz.
4. Little Crochet Angels
Every tree needs an angel, and the crocheted kind has a charm no shop version can match. The body is a simple cone worked in double crochet, the head is a small ball, and the wings are two fan-shaped pieces stitched on at the back — I have used everything from plain white to a soft gold metallic yarn for the halo. My grandmother’s angel pattern used a wooden bead for the head, and I still do it that way because the weight helps her sit upright on a branch instead of flopping forward. Give her a tiny loop at the top and she doubles as a tree topper for a small tabletop tree. I made a dozen of these one November while watching old Christmas films, and they remain the ornaments I reach for first.

5. Mini Wreaths
Mini wreaths are just a green ring — chain a length, join it, and work a few rounds of textured stitches like bobbles or puff stitches to suggest foliage — then you dress it up. I add three tiny red berries made from French knots or small crocheted balls, plus a miniature bow from ribbon. They take under an hour each, which makes them perfect for last-minute gifts or for filling gaps on the tree. My honest tip: use two shades of green held together or striped, because a single flat green can look a bit like a lifebuoy. I hang mine on the tree, but they also look lovely tied to napkins at the Christmas table, and a row of them makes a sweet garland — my crochet Christmas garland patterns show how to string small motifs together.
How I styled it
I cluster three mini wreaths together on one branch, like a little trio, instead of spacing them evenly — it reads as one intentional arrangement.
6. Crochet Candy Canes
Candy canes are the fastest ornament on this list, and kids love them. You crochet a long tube in red and white stripes, bend it into a hook shape, and slip a pipe cleaner inside so it holds the curve. I learned the pipe cleaner trick after my first attempt slowly straightened itself out on the tree over a week — embarrassing, but a good lesson. Make them in classic red and white, or try pink and white, or even green and white for a minty twist. They weigh nothing and they are sturdy, which makes them the rare ornament I let small children hang themselves. A dozen candy canes scattered through the tree with the striped baubles from idea one gives you a proper old-fashioned candy theme without much effort at all.

7. Tiny Christmas Trees
A tree on a tree — it sounds silly, but these little cone-shaped trees are ridiculously cute. Worked in rounds from the top down, increasing as you go, they get their shape from the cone itself, and you can add bobble stitches as “baubles” or sew on tiny beads afterwards. I made a set in three sizes once, using leftover green yarn from a blanket project, and they now live on the tree in a little forest grouping near the bottom. The trick to a good cone is stuffing it firmly, otherwise it slumps. If you want them to stand on a shelf as well as hang, crochet a tiny trunk and a flat base. These are also a brilliant stash-buster — every odd ball of green in your basket finally has a job.
8. Star Ornaments
Stars are the ornament I make when I want something beautiful but my brain is tired. Most patterns are worked flat in five points, and the real secret is blocking: pin the points out sharp, give them a light starch spray, and let them dry completely. My first unblocked stars looked like sad blobs, and I nearly gave up on the pattern entirely — blocking saved it. Use a gold or silver yarn for a classic look, or a soft yellow cotton for a more homespun feel. Stars also transition beautifully after Christmas; I leave a few up on a bare branch arrangement through January because they just look like winter. For a coordinated tree, pair them with the baubles and candy canes above — red, white, and gold never fails.

9. Crochet Snowmen
Snowmen are where amigurumi gets properly fun. Two white balls stacked, a tiny carrot nose in orange, coal eyes from black beads or French knots, and a scarf in whatever scrap yarn you have — I once used a single leftover length of Bernat stripes and it became the most complimented ornament on the tree. The fiddly bit is attaching the head straight; I sew it on with the body stuffed firmly, then adjust before knotting off. Keep the scarf long enough to wrap twice, and add a tiny hat if you are feeling ambitious. My snowmen live in a little group on the mantel from November onwards, then migrate to the tree in December. They also make adorable package decorations, tied on with twine.
What you need
White worsted yarn, small amounts of orange and black, beads or embroidery thread for eyes, and scrap yarn for the scarf.
10. Gingerbread Men
Gingerbread men are pure nostalgia in ornament form. The body is a flat gingerbread-brown shape — most patterns work it in one piece with arms and legs — then you embroider the details in white: squiggly icing lines, two eyes, a smile, and maybe two buttons down the front. I use a slightly darker brown than I first think I need, because lighter browns can look washed out against tree lights. My daughter’s gingerbread man has one eye bigger than the other, and honestly that is my favorite one. These pair beautifully with real gingerbread on the tree if you bake, and they smell-free, so they last forever. If you like the baking side of Christmas too, a gingerbread ornament set is a sweet nod to the kitchen.

11. Crochet Bells
Bells have a lovely old-church feel, and they are simpler than they look: a flared bell shape in gold or silver, a little clapper ball inside, and a loop on top. I crochet mine in a metallic-look yarn — Lion Brand has a good one — because a matte gold just does not catch the light the same way. The trick is working the flare: increase steadily for the skirt, then finish with a picot edge so it looks like a proper bell rim. Hang them in pairs with a ribbon bow and they read as a classic door-bell decoration, or scatter singles through the tree. A word of warning from experience: do not put a real jingle bell inside if you have cats. I learned that at 3 a.m.
12. Icicle Drops
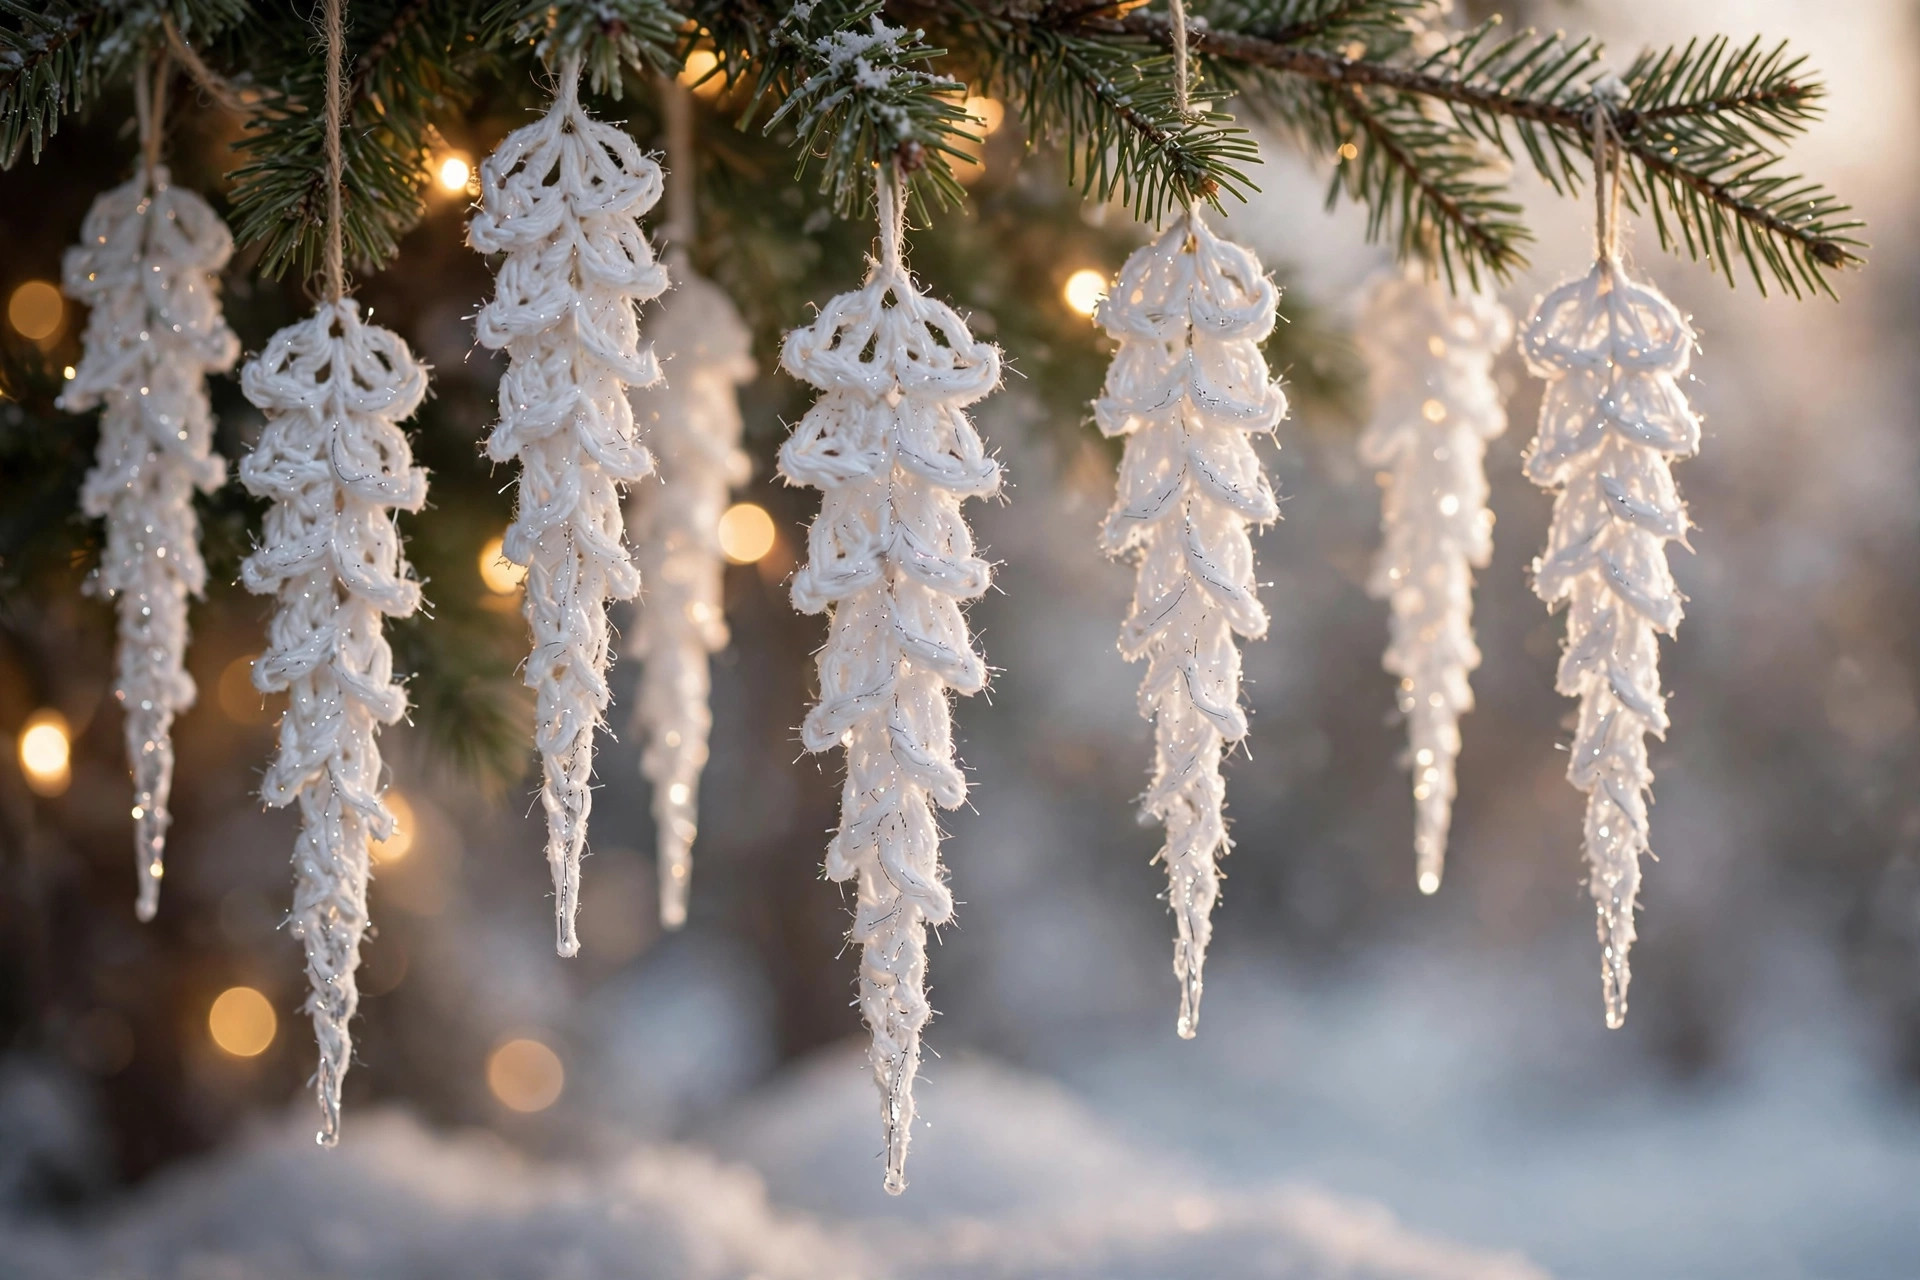
Icicles are the most elegant ornament on this list, and they cost almost nothing in yarn. They are long, tapered drops — worked from the top down with decreases, sometimes with a spiral twist — in white, pale blue, or a glittery yarn. I hang a cluster of five or six at different lengths from one branch and it genuinely looks like a frozen drip. The catch is that they need stiffening to hang straight; a soak in diluted fabric stiffener and a hang-dry with a tiny weight clipped to the tip does it. Mine are made from a sparkly white acrylic I found at Michaels, and in the tree lights they throw tiny rainbows. If you have a white or silver-themed tree, icicles are non-negotiable.
13. Poinsettia Blooms
Poinsettia ornaments are for the flower lovers. Each bloom is a set of layered petals — usually two rounds of pointed petals in red, with a yellow center made from French knots or tiny bobbles. I attach mine to the tree with a short stem loop, but they also work pinned to a wreath or glued to a hair clip for Christmas parties. The petals need a bit of shaping: I curl each one slightly forward with my fingers while the piece is still warm from blocking. If you have ever made crochet flowers before, this is a small step up; if not, start with a single bloom before committing to a set. A deep red poinsettia against a green tree is a classic for a reason, and the layered texture photographs beautifully.
How I styled it
I tuck poinsettias near the tips of branches where the light catches the layered petals, instead of burying them deep inside the tree.
14. Crochet Reindeer Heads
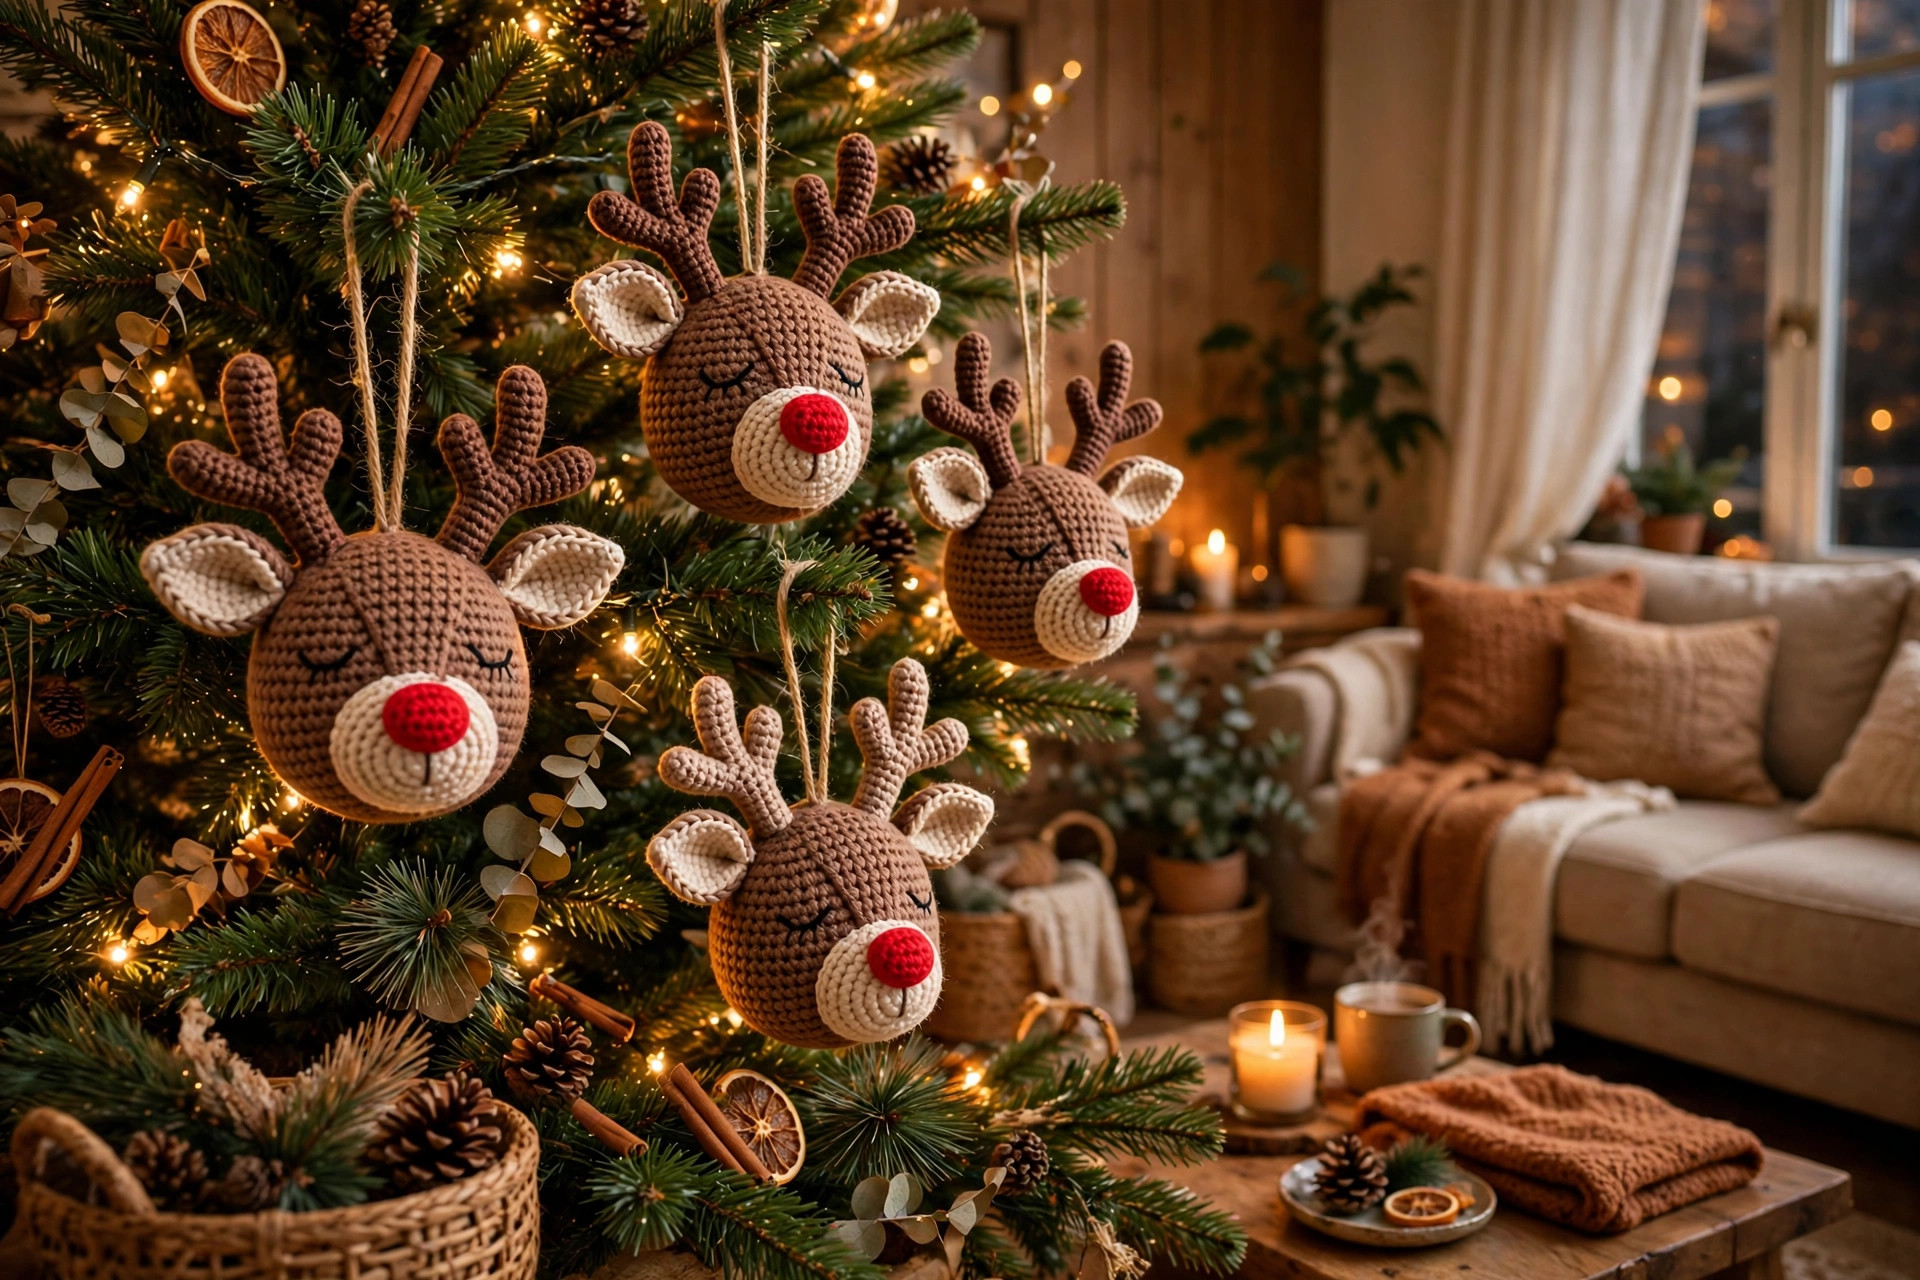
Reindeer heads are the ornament that gets the most comments in my house. The head is a simple oval, then you add a red nose (Rudolph, obviously), two tiny antlers in brown — I use a branching antler pattern rather than a straight one, because straight antlers look like twigs — and two ears. My first reindeer had antlers so small he looked like a mouse, so do not be shy with the antler size. These take a bit longer than a bauble, maybe two evenings, but they are worth it. I make one Rudolph with a red nose and the rest with brown noses, and the kids fight over who gets Rudolph on their side of the tree. They also look great on a woodland-themed tree with pinecones.
15. Santa Hats
Tiny Santa hats are absurdly cheerful. A red cone, a white brim — usually worked in a fluffy yarn or with bobble stitches for texture — and a white pompom on the tip. The pompom is the make-or-break detail: I make mine by wrapping yarn around a fork, tying it tight, and trimming it into a ball, which gives a much fuller pompom than the lazy wrap-around-fingers method. These hats are quick — under an hour each — and they look brilliant perched on other ornaments, like a hat on a snowman, or hanging on their own. I have also seen people put them on wine bottles at the Christmas table, which is a whole other level of festive. Keep the brim snug so the hat holds its cone shape.
16. Mini Mittens
Mini mittens are the cozy-cabin ornament. Worked like a tiny sock with a thumb, they are a great next step after the mini stockings because the construction is similar but smaller. I use a red-and-white striped pattern most years, with a white cuff, and I hang them in pairs tied together with a bit of twine — it looks like laundry on a line, in the best way. My tip: stuff them very lightly, just enough to hold the shape, because an overstuffed mitten looks like a boxing glove. These are also a lovely way to use up the last few yards of a special yarn you cannot bear to throw away. If you are planning a whole handmade tree, mittens and stockings together give you a proper winter-wear theme. For a bigger winter project, my crochet blanket patterns for beginners are a good place to start after the ornaments are done.

17. Crochet Hearts
Hearts are not just for Valentine’s Day — a deep red crochet heart on a Christmas tree looks warm and a little bit vintage. The classic heart pattern is worked in two lobes joined at the top, then decreased to a point, and it is one of those shapes that looks harder than it is. I stuff mine lightly and add a hanging loop at the top center so they sit straight. My tree has a handful of hearts in red and cream scattered among the baubles, and they soften the whole look. They also make lovely ornaments for a first Christmas as a couple, or for a tree dedicated to family — I embroidered a tiny initial on one heart for each family member one year, and those are now the ornaments nobody is allowed to touch.
18. Nutcracker Guards
Nutcrackers are a bolder project, but so worth it. The classic guard shape — tall hat, jacket, white trousers — translates surprisingly well to amigurumi if you work it in sections and sew it together. I made my first nutcracker over a long weekend, and I will be honest: the jacket details (gold buttons, epaulettes) took as long as the body. But the result is a proper statement ornament, the kind people assume you bought from a craft fair. Keep the color palette tight — red, black, gold, white — or it turns chaotic. If you are short on time, make just the head as a flat ornament instead of the full figure; you still get the nutcracker look for half the work. Pair him with the bells and stars for a classic toy-soldier tree.

19. Beaded Baubles
If plain baubles bore you, beads are the upgrade. You thread beads onto your yarn before you start crocheting, then push a bead up into place every few stitches as you work around — it sounds fiddly, but after a round or two it becomes rhythmic. I use small glass beads in gold and silver on a deep red or green base, and the finished bauble catches the light like a jewel. The trick is threading plenty of beads at the start, because adding more mid-round is a pain. These take longer than plain baubles, so I make just four or five and let them be the “special” ornaments among the simpler ones. For texture inspiration, the overlay mosaic crochet patterns use a similar bead-like raised effect in a different way.
20. Woodland Mushrooms
Mushrooms are the whimsical wildcard of this list, and they suit a woodland or nature-themed tree perfectly. A red cap with white spots — the spots can be French knots or tiny sewn circles — on a cream stem, and you have a toadstool ornament in under an hour. I made a set after seeing them on a Scandinavian Christmas market stall, and they remain the ornaments my friends ask about most. The spots are the detail that sells it: take your time placing them evenly, or embrace the wonky handmade look, which honestly suits mushrooms. Hang them low on the tree where people can see them properly, or group them with pinecones and the reindeer from idea fourteen for a full woodland corner. They also look adorable on a wreath.

21. Personalized Initial Ornaments
Initial ornaments are the ones that turn a tree into a family tree. The simplest version is a flat letter worked in single crochet with a border, or a bauble with an initial embroidered on it in a contrasting color — I do the embroidered version because the letters come out cleaner. I started this tradition the year my daughter was born, making one ornament per family member in their favorite color, and now the tree has a whole alphabet’s worth of initials across the branches. It takes a little planning to keep the letters consistent, so I sketch each one on graph paper first. If you are making these as gifts, start early — everyone wants one once they see them. For the tree they hang on, my Christmas tree decorating ideas will help you style the whole look.
Styling Tips
- Hang your heaviest ornaments (stuffed snowmen, nutcrackers) on sturdy inner branches, and save the delicate snowflakes and icicles for the branch tips.
- Block flat ornaments like stars and snowflakes before they go on the tree — ten minutes of pinning saves a season of curling.
- Repeat each ornament type at least three times around the tree; a single lonely bauble looks like an accident, a trio looks intentional.
- Mix textures: matte cotton, fluffy yarn, metallic thread, and beaded pieces together keep the tree from looking flat.
- Step back and squint every so often while decorating — it shows you where the color is pooling and where the tree is thin.
- Store handmade ornaments in tissue paper, not plastic bags, so the yarn can breathe and the shapes survive until next December.
Frequently Asked Questions
How do you crochet a Christmas ornament for beginners? Start with a simple round shape like a striped bauble: work in continuous rounds of single crochet, increase evenly to form a ball, stuff lightly, then decrease to close. Use worsted weight yarn and a 4mm hook, keep a stitch marker at the start of each round, and pick a pattern with no more than two colors. Your first ornament will take about an hour, and the second will take half that.
What yarn is best for crochet Christmas ornaments? Worsted weight acrylic is the best all-rounder: it holds its shape, comes in every Christmas color, is cheap, and survives storage. Use cotton yarn for flat ornaments like snowflakes and stars because it blocks crisply. Save fluffy or novelty yarns for accents like cuffs and pom-poms, since they hide your stitches and make counting hard.
How do you stiffen crochet ornaments so they hold their shape? The easiest method is a soak in diluted fabric stiffener or a 50/50 mix of white glue and water, then shape the piece and let it dry flat or pinned out. For stars and snowflakes, pin each point out on a foam board before it dries. For icicles, hang them with a small weight clipped to the tip so they dry straight. A light spray starch also works for pieces that only need a little body.
When should you start crocheting Christmas ornaments? Start in September or October if you want a full handmade tree, because a set of twenty ornaments at an hour or two each adds up fast. If you only want a handful, November is plenty. I start my ornament pile in early October and add one or two a week, which means December is for decorating, not panicking.
Final Thoughts
Here is what I have learned after years of crocheting ornaments: the imperfect ones are the ones you love most. The angel that leans, the snowman with the wonky scarf, the gingerbread man with mismatched eyes — those are the ornaments with stories, and they are the reason a handmade tree beats a shop-bought one every time. Pick three or four patterns from this list to start, keep your first attempts simple, and do not worry about perfection. By next Christmas, your tree will be full of little handmade memories, and you will be the person everyone asks where you got your ornaments. And when you are ready to dress the rest of the house, a few well-chosen tree ideas will help you tie the whole room together.