Introduction
Every October I tell myself this is the year I will carve something impressive, and every October I end up googling pumpkin carving ideas at the last minute with pumpkin guts already up to my elbows. If that sounds familiar, this list is for you. I have gathered 25 pumpkin carving ideas that run the full range from dead-simple faces a five-year-old can draw to etched shading work that will make your neighbors stop mid dog-walk. No specialty art degree required for most of them — a basic Halloween pumpkin carving kit, a steady hand, and one free evening is honestly all you need. I have carved most of these myself over the years, messed up a few spectacularly, and learned which shortcuts actually work. Below you will find easy pumpkin carving ideas for beginners, classic jack o lantern carving ideas, stencil-friendly designs, and a few intermediate challenges for when you are feeling ambitious. Pick your pumpkin, grab your tools, and let us get carving.
1. Classic Triangle-Eye Jack-O’-Lantern
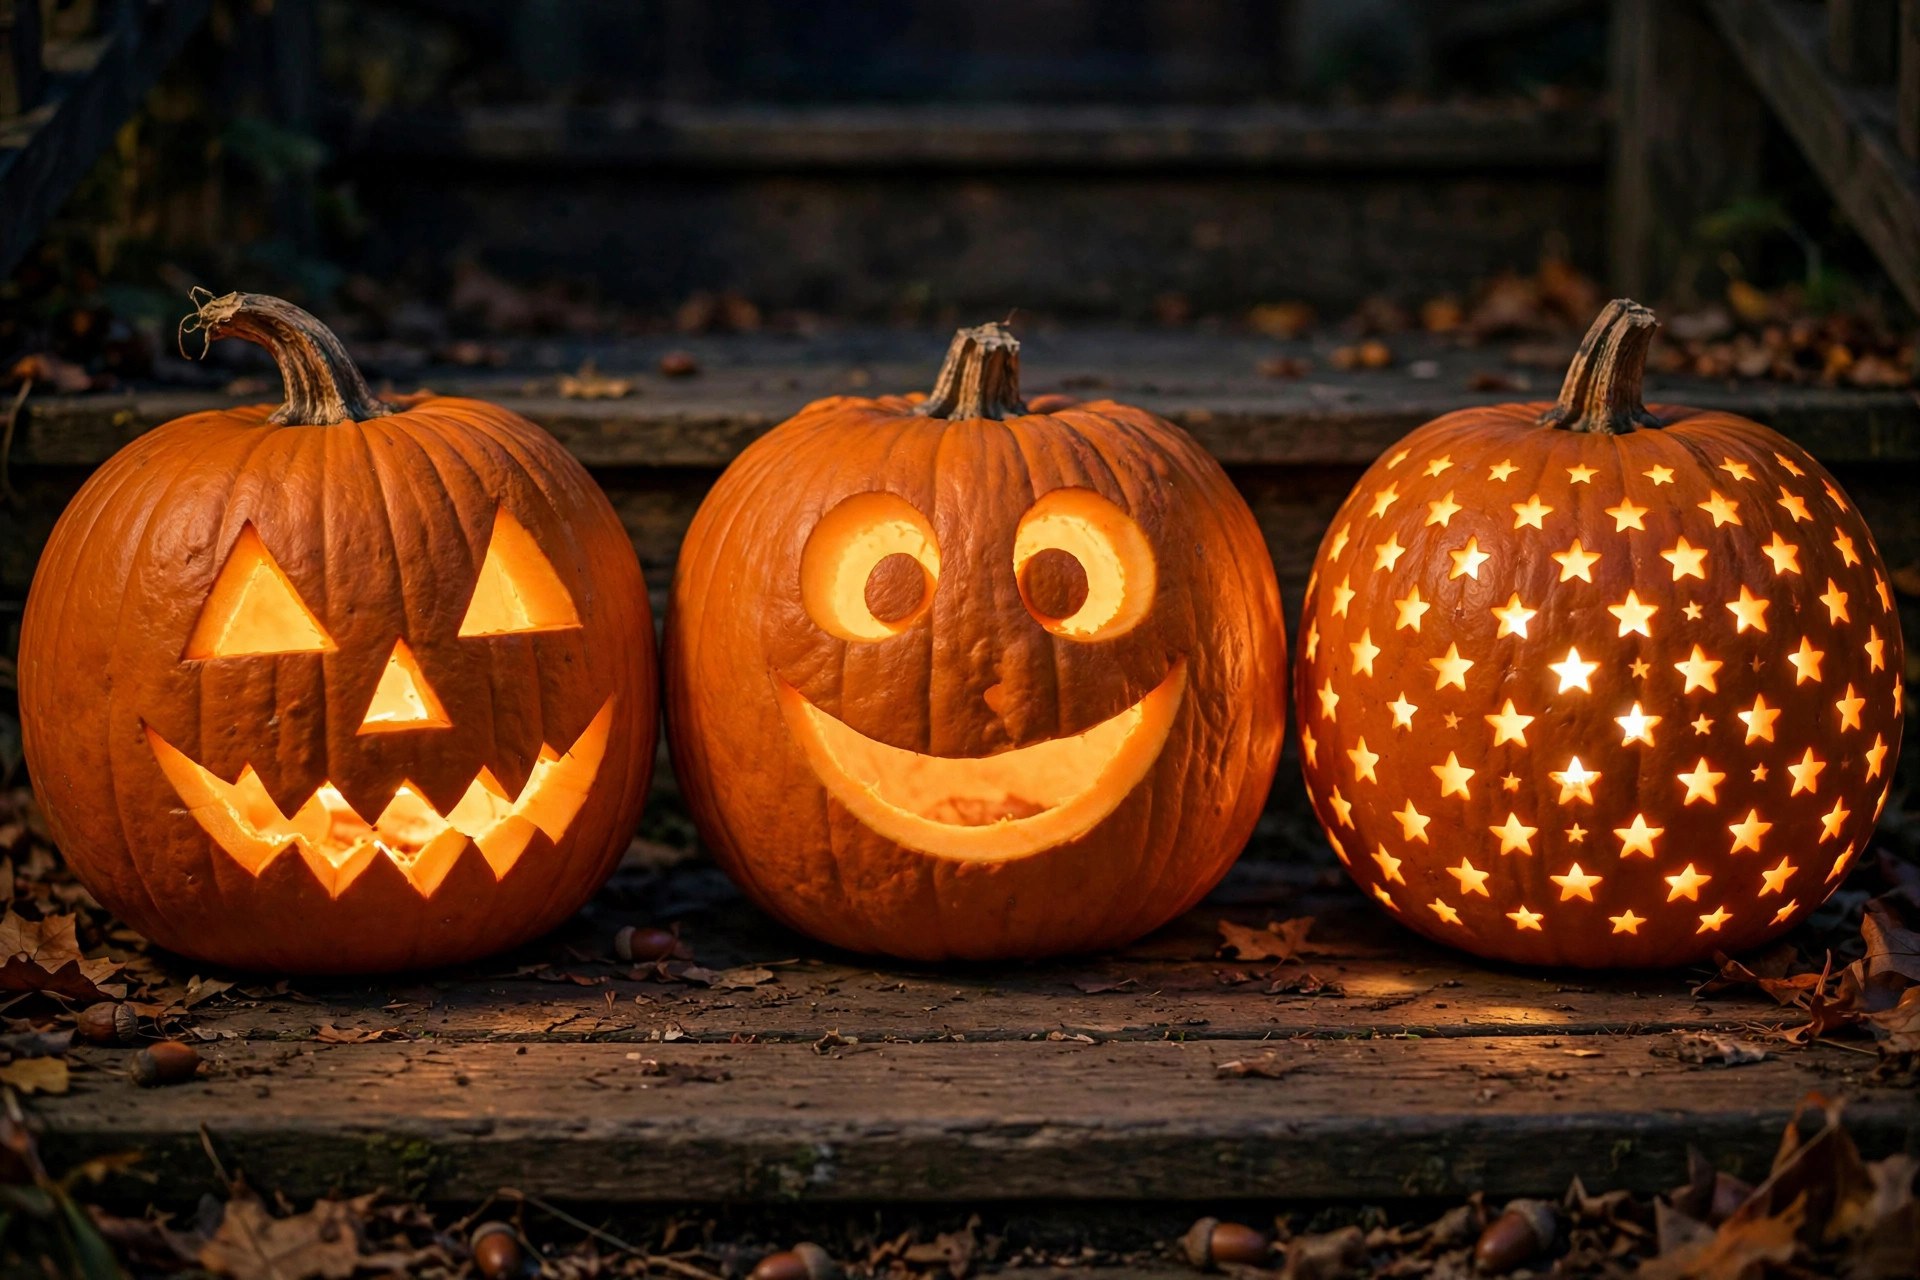
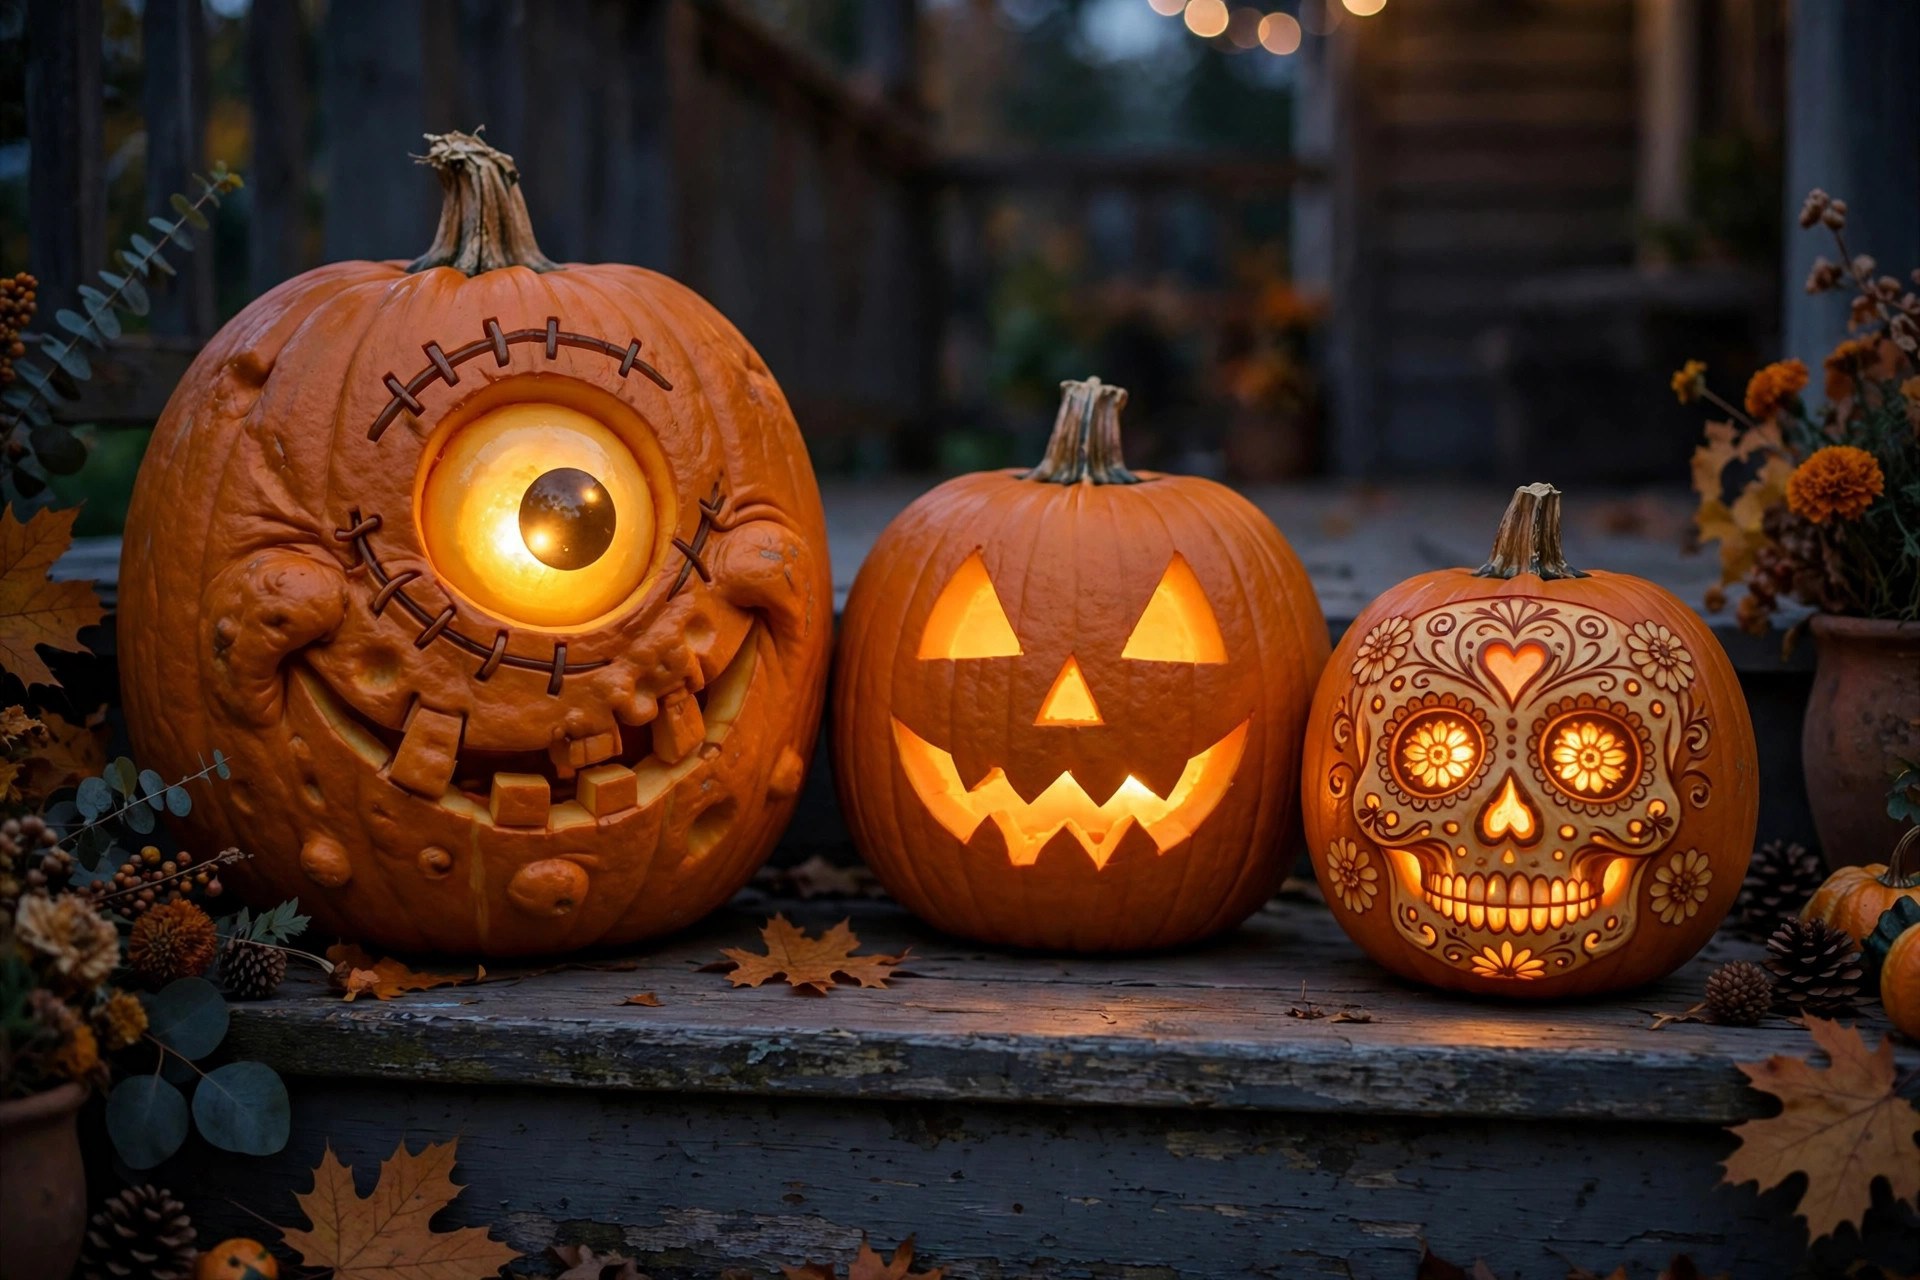
You cannot talk about pumpkin carving ideas without starting here, and honestly there is no shame in it. The classic jack-o’-lantern — two triangle eyes, a triangle nose, and a jagged grin — is the design that taught most of us how a serrated carving saw works. Draw the face with a dry-erase marker first (it wipes right off if you wobble), then push the saw in and out with short, gentle strokes instead of forcing it. Keep the mouth pieces connected to the rind so the teeth do not flop inward. I carve one of these every single year alongside whatever fancy design I am attempting, because the classic is what the kids actually get excited about. Light it with a battery-operated tea light and it looks exactly like the Halloween you remember. This is the single best of the easy pumpkin carving ideas for a first-timer: it forgives shaky lines, takes about twenty minutes, and photographs beautifully on the porch.
2. Toothless Grin
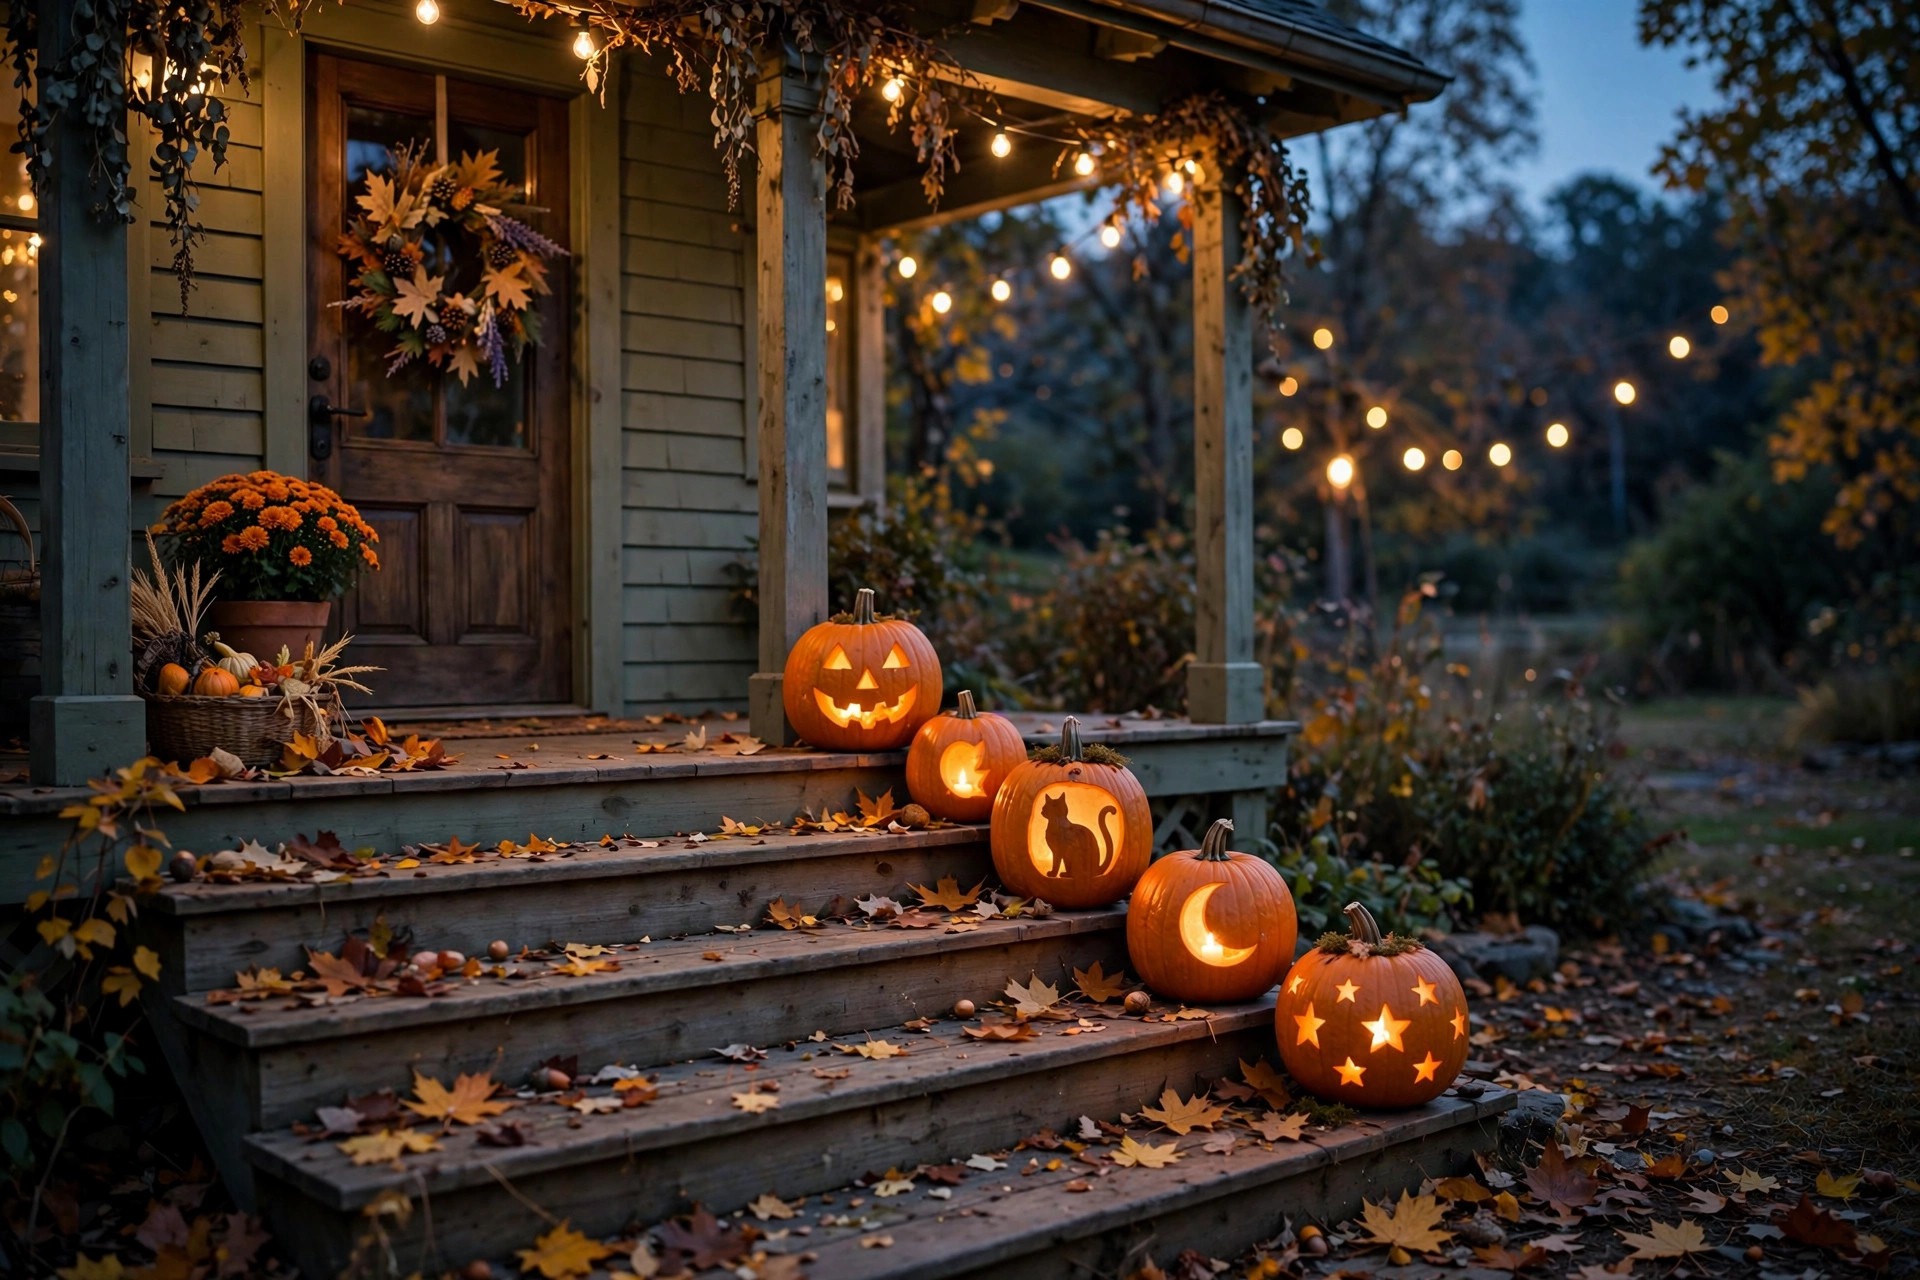
Take the classic face and knock out a tooth. That is the whole trick, and it never fails to make people laugh. Carve round eyes instead of triangles — circles read friendlier — then give your pumpkin a big open smile with one square tooth missing in the middle. The missing tooth is just a small rectangle you cut out of the upper lip line, but it changes the entire personality of the face from spooky to goofy. This is a great pick for households with small kids who think scary faces are, well, scary. Let the little ones draw the face themselves; the wobblier the grin, the more character it has. I have found that drawing the mouth as one big oval first and then adding the teeth as separate small cuts keeps the shape symmetrical. Simple, fast, and one of the simplest simple halloween pumpkin carving ideas that still looks intentional when lit up at night.
3. Starry Night Cutouts
No face at all — just punch a sky full of stars into your pumpkin and let the candlelight do the rest. Use a small drill bit or an apple corer to punch holes of different sizes all over the pumpkin, clustering them tighter on one side like a real constellation. When you drop an LED flameless candle inside, each hole throws a warm dot of light onto the porch floor and it looks genuinely magical. This is the easiest of the easy pumpkin carving ideas because there is no design to mess up; random placement actually looks better. A rubber mallet and a set of metal cookie cutters in star shapes work too if you do not own a drill — just press and twist firmly. Kids can do the whole thing with a plastic pumpkin carving kit from the dollar store. My honest opinion: this outshines half the fussy faces on my street every year, and it takes a fraction of the effort.
4. The Winking Face
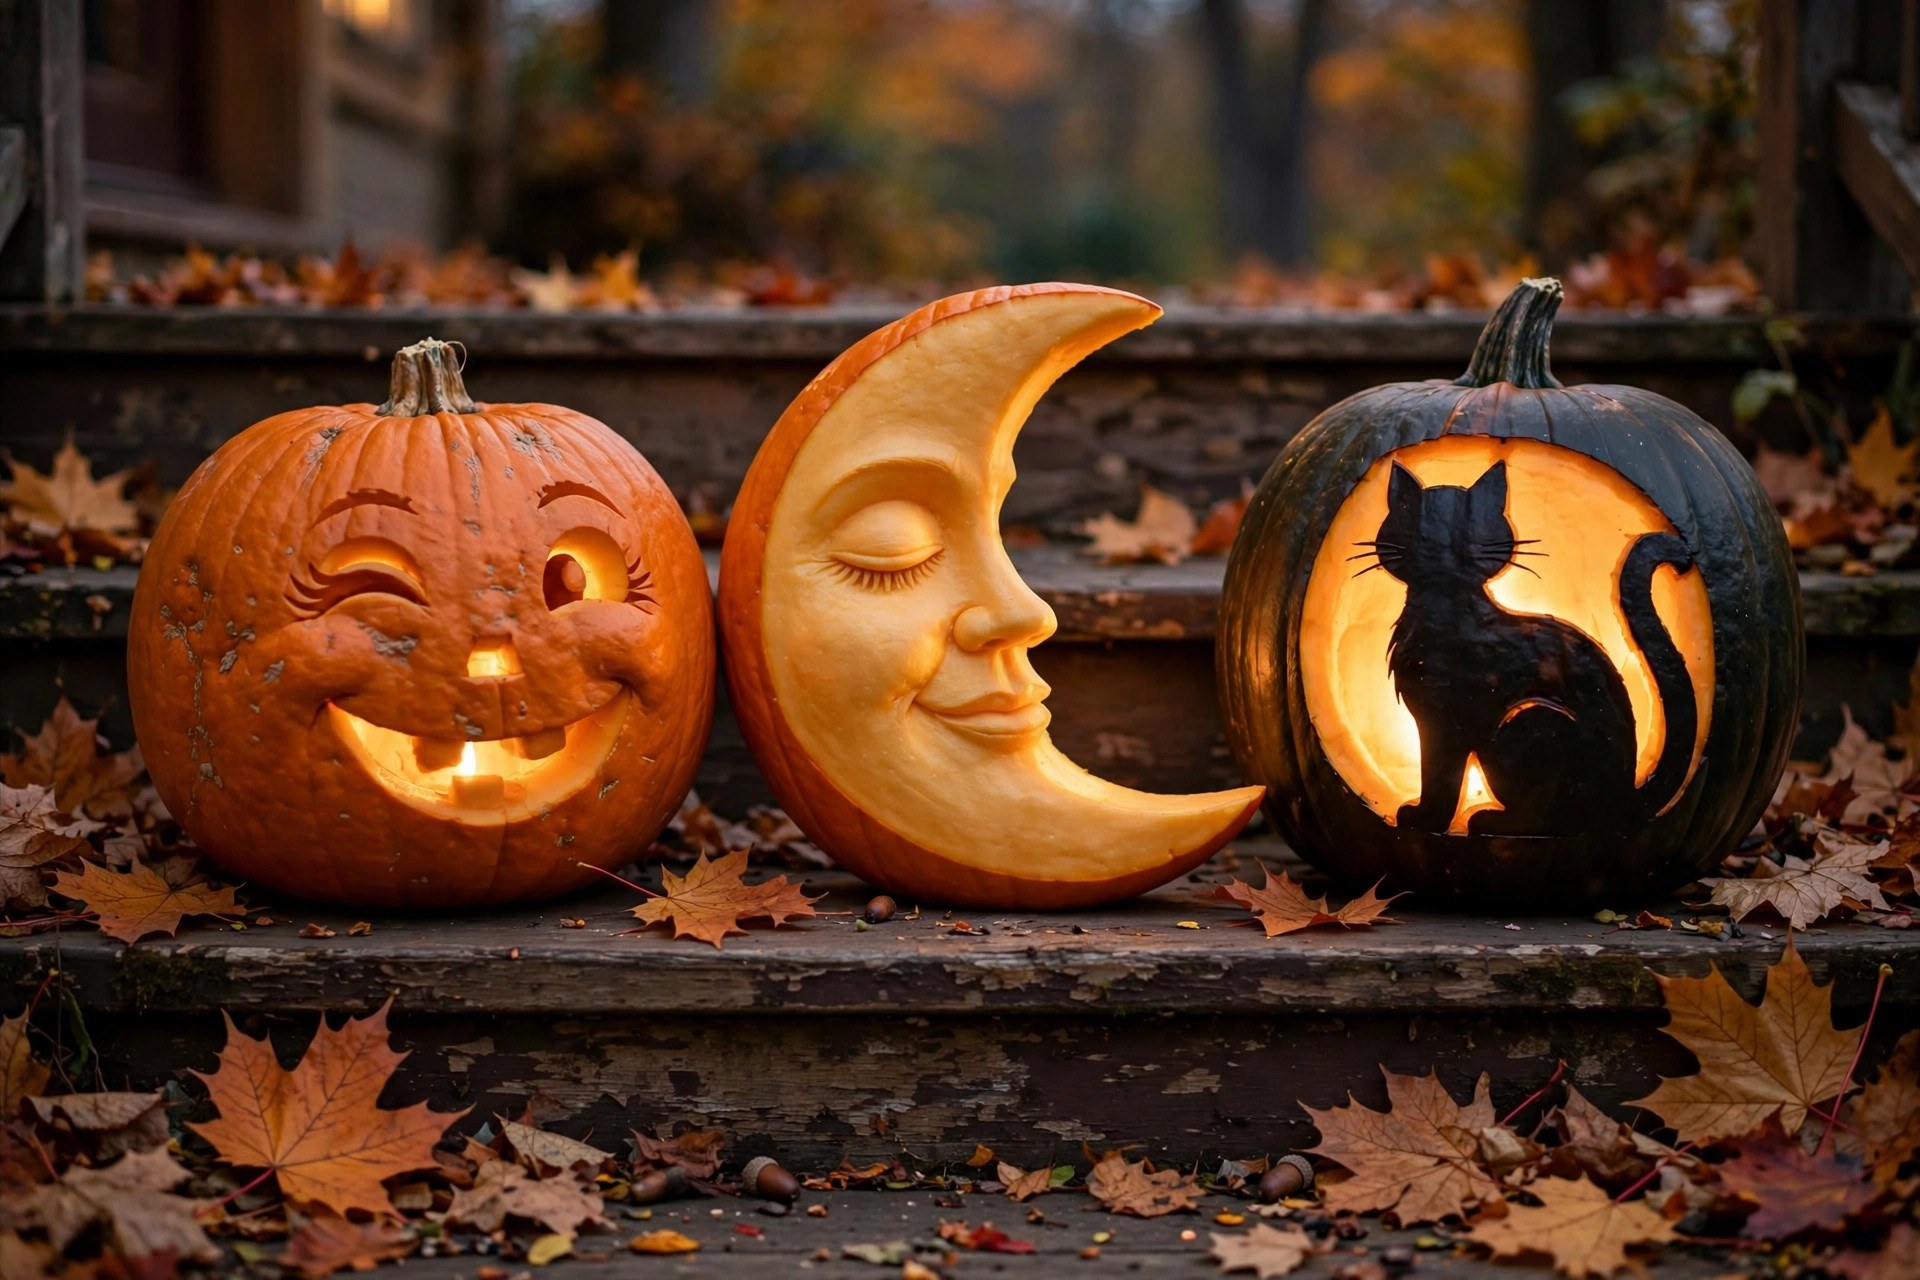
One open eye, one winking eye, and a lopsided smirk — the winking pumpkin has mischief baked in. Carve one round eye and one curved line for the closed winking eye, then cut a crooked smile that tilts up on the winking side. The asymmetry is the whole point, so do not stress about matching sides. This design shines on tall, narrow pumpkins where a face would otherwise look stretched. I like drawing it with the marker cap on first to get the proportions right, since the smirk placement makes or breaks the joke. Use the smallest saw in your Halloween pumpkin carving kit for the wink line so it stays thin and crisp. It reads as playful rather than scary, which makes it a solid porch pumpkin when you want festive but not frightening. Takes about fifteen minutes once the pumpkin is gutted, and it is one of those jack o lantern carving ideas easy enough for a teenager to nail on the first try.
5. Sleepy Moon Face
Carve a big crescent moon shape out of one side of the pumpkin, then carve a sleepy face inside the moon — closed curved eyes, a tiny nose, a soft small smile. The trick is leaving the moon’s points attached to the surrounding rind so the whole thing does not collapse; carve the face first, then carefully free the crescent around it. When lit, the crescent glows like an actual moon and the sleepy face reads sweet instead of spooky. This is one of my favorite cute pumpkin carving ideas for a front step because it feels calm and welcoming rather than startling. It works on medium pumpkins where a full face would crowd the surface. If the crescent’s thin points feel fragile, thicken them — a chubby moon is sturdier and honestly cuter. A cool-white LED tea light inside gives it a moonlit feel that warm candles cannot match.
6. Simple Cat Silhouette
Black-cat season demands a cat pumpkin, and the silhouette version is far easier than it looks. Find a simple cat outline — arched back, tail up — in any printable stencils pack online, tape it to the pumpkin, and poke the outline with a pushpin or the poking tool from your carving kit. Then carve along the dots, removing the whole cat shape so the light shines through the silhouette. The ears are the fiddliest part; cut them last, with the pumpkin fully supported, so the thin points do not snap. I tape the stencil down with painter’s tape because regular tape peels pumpkin skin, which I learned the annoying way. This is a perfect first stencil project and a great answer to anyone hunting for carved pumpkin patterns that do not require freehand skill. Pair it with a bat or two from idea 15 and your porch starts telling a story.
7. Happy Ghost
Cut a ghost shape straight out of the pumpkin’s front — rounded head, wavy bottom edge, two oval eyes and a little “o” mouth left as uncut rind inside the ghost. The ghost itself glows when lit, which looks fantastic after dark. The wavy bottom is the only part that needs care: keep the waves shallow and rounded, because sharp zigzags create weak points that crack as the pumpkin dries. This is one of the best simple halloween pumpkin carving ideas for kids to help with, since they can draw the ghost shape and an adult handles the saw. I carve the eyes and mouth first while the rind is strongest, then free the ghost outline. If you want to get fancy, carve two or three ghosts in different sizes floating across the pumpkin. A flickering LED candle inside makes them look like they are actually drifting.
8. “BOO!” Lettering
Letters feel intimidating until you realize you are just carving big blocky shapes. Write “BOO” in fat bubble letters across the pumpkin with a marker, then carve each letter out completely so the light shines through the word. The secret is making the letters chunky — thin strokes collapse and thick letters survive a week on the porch. Carve the insides of the O’s last and push them out gently from the inside. I messed this one up the first time by making elegant skinny letters that crumbled by Halloween; lesson learned, go bold. This is a crowd-pleaser on the porch because trick-or-treaters can read it from the sidewalk, and it pairs perfectly with the ghost and cat pumpkins for a little scene. Try “EEK” or “HI” on smaller pumpkins if BOO feels too ambitious. If you are carving with kids, have them pick the word — our easy paper crafts for kids roundup has more Halloween-night activities once the carving is done.
9. Vampire Face
Angry slanted eyebrows, glowing eyes, and two sharp fangs — the vampire is the easiest “scary” face that still reads clearly from the street. Carve the eyes as downward-slanting triangles, add a widow’s-peak hairline by shaving (not cutting through) the top of the pumpkin, and cut two pointed fangs hanging from the upper lip of a wide grin. The fangs are the money detail: make them long and slightly curved for maximum drama. Here is my honest take — this design needs a strong light inside, because the scary lives in the contrast between the lit eyes and the dark rind. A real candle gives the best flicker, but keep it away from the dried inner walls and never leave it unattended; honestly, a bright LED flameless candle is the safer porch choice and looks nearly as good. This is one of the great jack o lantern carving ideas for teens who want spooky without spending two hours on it.

10. Spider Web Etching
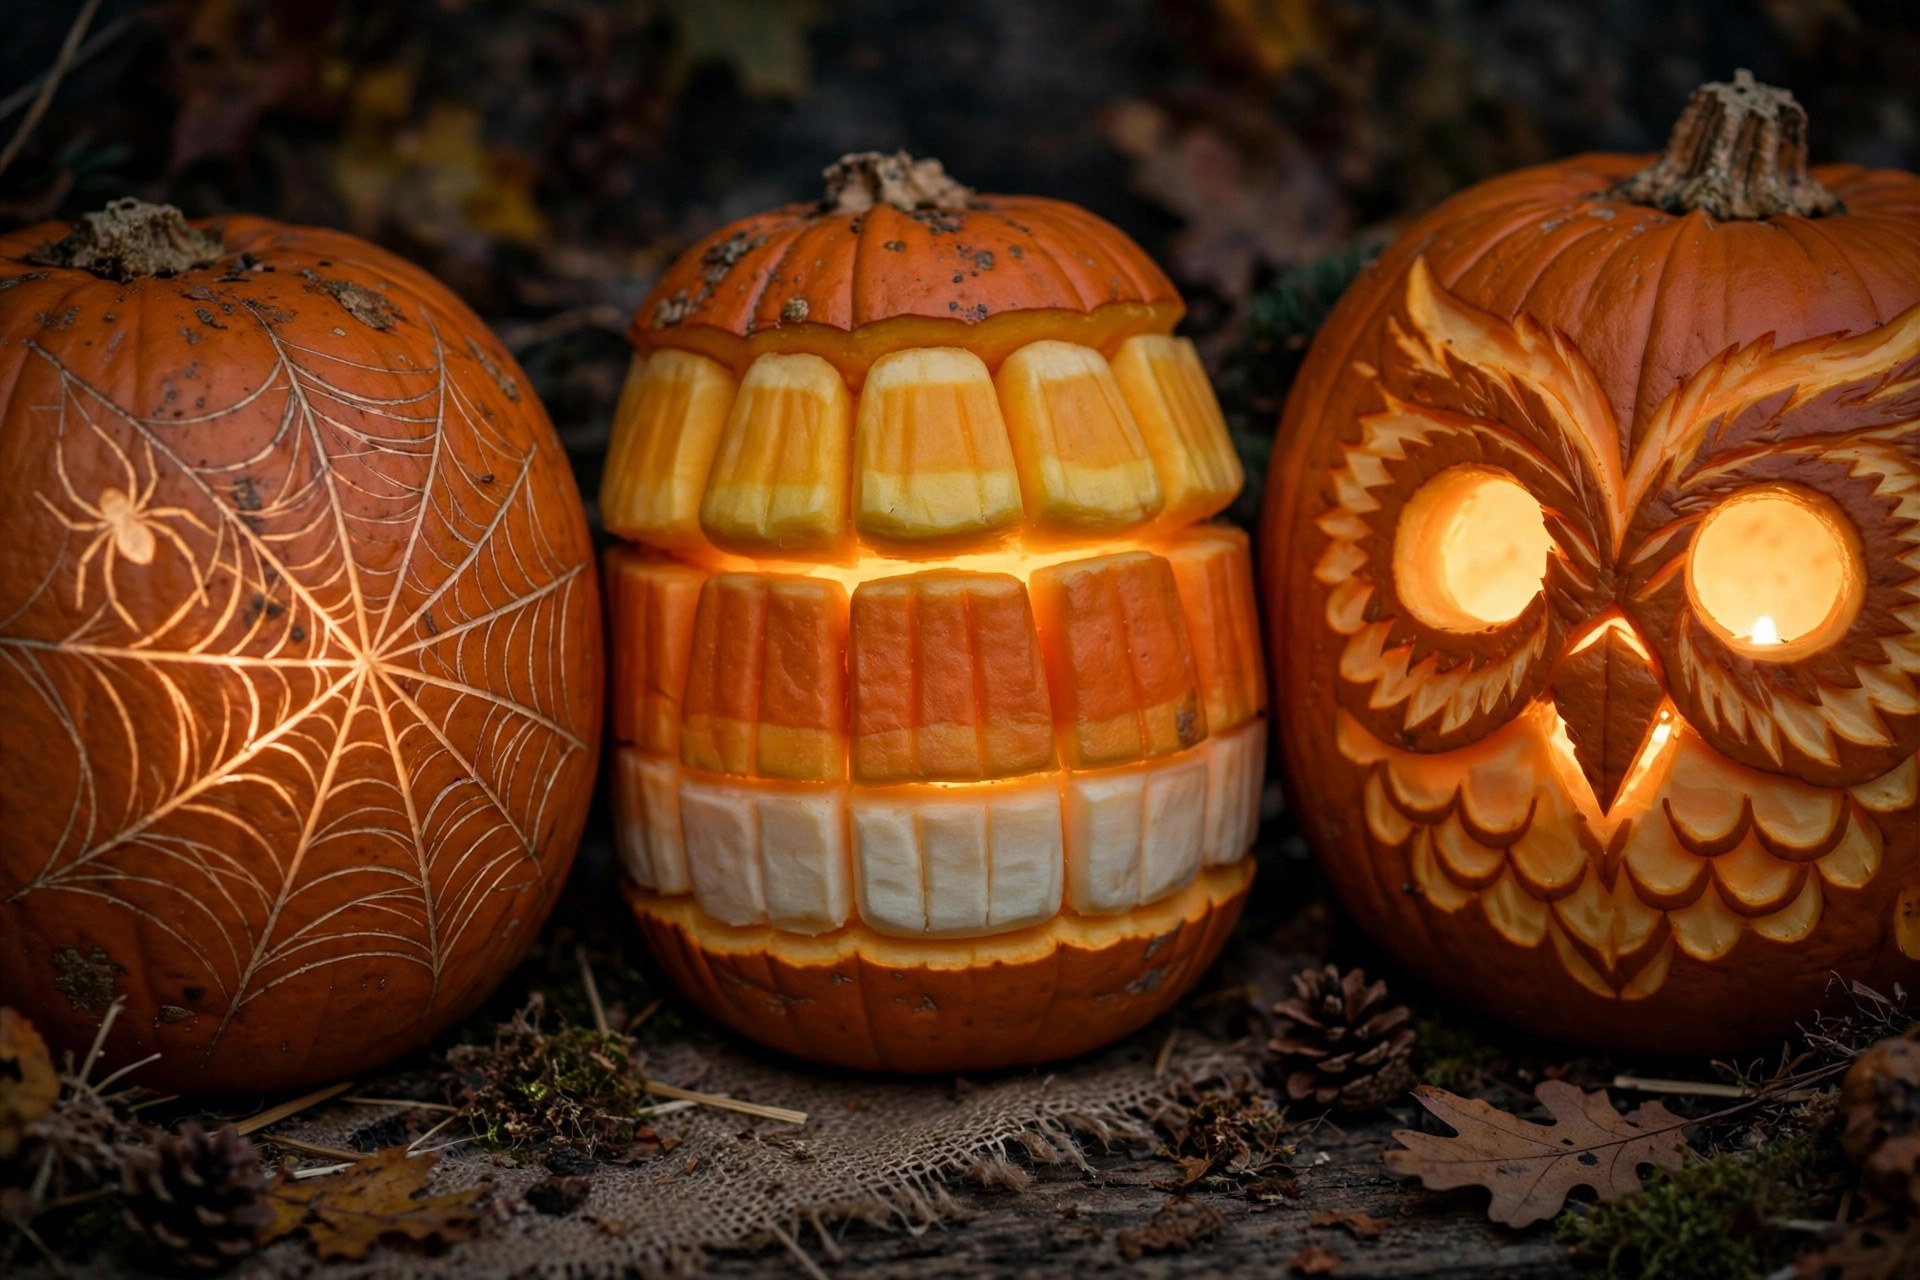
This one uses shaving instead of cutting through, and the result looks far more advanced than the effort involved. Do not cut all the way through the rind — instead, use a linoleum cutter or a clay loop tool to scrape away just the outer orange skin in a spider web pattern, exposing the pale flesh underneath. When lit from inside, the scraped lines glow while the untouched rind stays dark, giving you a luminous web. Draw the web first: a center point, radiating lines, then connecting arcs. The scraping takes patience but zero sawing skill, which makes it a brilliant intermediate step up from basic faces. Add a small plastic spider on top for the full effect. This technique — sometimes called pumpkin shaving — is the gateway to the etched designs later in this list, and it is one of the most impressive carved pumpkin patterns you can pull off with a five-dollar tool.
11. Candy Corn Layers
Carve three stacked horizontal bands around the pumpkin — a wide triangle section at top, middle band, bottom band — mimicking candy corn’s white, orange, and yellow stripes. Actually here is the clever part: you carve away the bands at different depths. Cut the top band clean through for the brightest glow, shave the middle band’s skin for a medium glow, and leave the bottom untouched for contrast. The layered light effect is genuinely striking and unlike any face on the block. This works best on round, evenly shaped pumpkins so the bands sit level; draw guide lines with a rubber band stretched around the pumpkin as a straightedge. It is fiddly but forgiving, because bands are just straight cuts. I think this is one of the most underrated pumpkin carving ideas — it reads as “designed” rather than “carved,” and it photographs beautifully for anyone documenting their fall porch decor this season.
12. Owl Face
Two huge round eyes, a small triangular beak, and feather texture shaved around the edges — the owl is a hoot (sorry) and a perfect intermediate project. Carve the eyes as large circles and place a battery tea light behind each so they glow like real owl eyes at night. Shave feather scallops into the rind around the face with a linoleum cutter instead of cutting through; the etched texture catches the light and gives the owl dimension. The beak is a small downward triangle between and slightly below the eyes. Keep the eyes big — small eyes make it look like a surprised frog, which I discovered to my cost one October. This design suits wide, squat pumpkins that naturally have an owl-ish face shape. It is a solid step up from beginner faces without requiring stencil work, and the glowing eyes are a genuine showstopper after dark.
13. Haunted House Silhouette
A crooked haunted house with a glowing window or two is pure Halloween atmosphere. This is a stencil-friendly design: find a haunted house outline, transfer it with the tape transfer method — print the stencil, tape it to the pumpkin, poke along the lines — then carve the house shape out completely. The windows are the detail that sells it: leave small rectangles of rind inside the house shape uncut, or cut them out and cover the holes from inside with orange tissue paper so they glow amber. Cut the crooked chimney and broken fence line carefully; thin protrusions snap easily, so keep them chunky. I light this one with two tea lights to make sure the far windows actually glow. It takes about forty minutes with a stencil, and it is one of those pumpkin carving ideas stencil users specifically hunt for — dramatic, readable from the street, and far easier than freehanding architecture.
14. Witch on a Broomstick
The classic witch silhouette flying past a moon is the most requested stencil design I know, and for good reason — it is instantly recognizable. Tape your printed witch stencil to the pumpkin, poke the outline, and carve the silhouette through. Then carve a large circle behind her (or shave it for a dimmer glow) to create the full moon she is flying across. The broom bristles are the delicate part; if your stencil’s bristles are too fine, simplify them into a solid tapered shape. Position the witch high on the pumpkin so the moon has room below her. My first attempt put her dead center and she looked like she was sitting on the ground — placement matters more than precision here. This pairs beautifully with the haunted house for a full spooky scene across two pumpkins, and it is one of the best answers to “what are the best Halloween pumpkin carving ideas” when someone wants classic imagery done well.
15. Bat Swarm
Forget one big bat — carve a dozen small ones swooping across the pumpkin and it looks like they are in motion. Small bat shapes are just two curved wings and a body, and at small sizes nobody will scrutinize your wing symmetry. Carve them in different sizes, largest near the “front” of the swarm, trailing off smaller toward the back, which creates a sense of depth and movement. This is genuinely one of the easiest pumpkin carving ideas on this list because each bat takes about two minutes and imperfections read as motion blur. Scatter a few bats onto a second pumpkin to continue the swarm across your display. I like carving these freehand with the small detail saw, no stencil needed — draw a simple “m” shape with a body and you are done. When lit, the swarm throws bat-shaped shadows on the wall behind, which is a bonus effect you do not get from face designs.

16. Frankenstein’s Monster
Flat head, heavy brow, stitched scar, and two bolts — Frankenstein’s monster is basically rectangles, which makes him wonderfully carveable. Cut a flat-topped head shape, add a unibrow ridge by leaving a thick bar of rind above the eyes, carve square mismatched eyes, and stitch a scar across one cheek by shaving a line and poking “stitch” dashes along it. The neck bolts are the fun part: push two large bolts (real ones from the hardware drawer, or carved wooden dowels) into the sides of the pumpkin. I used actual bolts one year and they looked incredible, though they do weigh the pumpkin down — carve them as part of the design if you are worried. Green-tinted? No — keep the rind natural; the shape does the work. This is a fantastic pick for a monster-movie fan’s porch and one of the funnier spooky pumpkin carving ideas that still looks cool lit up.
17. Scaredy Cat (Arched Back)
Different from the simple silhouette in idea 6 — this is the full Halloween-cat: arched back, puffed tail, mouth open in a hiss. Carve the arched-back cat shape through the rind, then carve the mouth as a separate open oval with two tiny fang triangles. The hiss mouth is what separates “cat” from “scaredy cat,” so do not skip it. Shave fur texture into the tail and back with a linoleum cutter for extra credit — the etched lines glow softly and suggest puffed-up fur. This one needs a medium-to-large pumpkin because the arched shape is tall; cramming it onto a small pumpkin makes the legs stubby and sad. Take your time on the tail curve — it is the longest continuous cut and the place most likely to wander. When it is lit and sitting next to the witch pumpkin, your porch has a proper Halloween narrative going.
18. Etched Autumn Leaves
Put the saw down for this one. Using a Dremel with a small carving bit — or a linoleum cutter if you are patient — shave leaf shapes into the pumpkin’s surface without cutting through, varying the depth so some leaves glow brighter than others. Oak, maple, and birch leaf outlines are all easy to find as printable stencils; tape one on, trace with the poking tool, then shave inside the lines. The depth variation is the artistry here: shallow scrapes glow faintly, deeper gouges shine bright, and you get a tonal, almost watercolor effect when lit. This is genuinely relaxing carving — no sawing, no structural worries, just meditative scraping. It also lasts longer than cut-through designs because the rind stays intact; rub a little petroleum jelly on the shaved areas to slow browning. I think etched leaves are the most elegant of all pumpkin carving ideas, and they transition beautifully into Thanksgiving porch decor.

19. Monster Mouth (The Pumpkin Eater)
Skip the face entirely and carve one enormous jagged mouth that takes up the whole pumpkin — the “pumpkin eater.” Cut a huge zigzag grin with tall triangular teeth top and bottom, leaving the teeth as rind while the mouth interior is fully removed. The bigger and more jagged, the better; this design rewards aggression. Add two small angry eyes above if you want, but honestly the mouth alone is scarier. The structural trick: keep at least an inch of rind between the mouth’s edge and the pumpkin’s top and bottom, or the whole thing sags as it dries. This is the design I carve when I am short on time but want maximum impact — it takes maybe twenty-five minutes and looks absolutely feral lit up at night. Kids find it hilarious rather than frightening, which makes it a safe “scary” pick for a family porch. One of the great simple halloween pumpkin carving ideas hiding in plain sight.
20. Skull
A proper skull — round cranium, hollow eye sockets, nasal cavity triangle, and individual teeth — is the intermediate carve that earns its difficulty. Carve the eye sockets as large rounded shapes and shave (do not cut) the cheekbones so they glow dimmer than the eyes, creating depth. The teeth are the make-or-break detail: carve the mouth as one rectangle, then cut thin vertical lines to separate individual teeth, keeping each tooth attached at the top and bottom. Thin teeth snap, so make them wider than you think they should be. I ruined my first skull by carving needle-thin teeth that broke off by morning — chunky teeth read just as well from six feet away. Light it from below with the tea light pushed toward the front so the eye sockets cast upward shadows. This is the carve that gets photographed, so take your time; about an hour for a good one.
21. Gnome with a Pointy Hat
Cute alert: carve a gnome face — big round nose, bushy beard suggested with shaved texture, and a tall floppy hat carved as the pumpkin’s top section. The hat is the clever bit: carve the hat shape into the upper third of the pumpkin and let the stem become the hat’s tip. Shave the beard area with a linoleum cutter in downward strokes for a fur-like glow, and carve two simple dot eyes peeking out above the nose. Leave the nose as a raised uncut bump — carve around it — so it catches the light. This is one of my favorite cute pumpkin carving ideas because it is friendly enough for a daytime porch and still glows nicely at night. It suits tall pumpkins with long stems, so pick your pumpkin with the hat in mind. If carving feels like too much one year, our mini pumpkin painting ideas are the no-knife alternative for the same cozy vibe.

22. One-Eyed Monster
A single enormous eye in the middle of the pumpkin, ringed with shaved radiating lines, plus a small wobbly mouth underneath — the one-eyed monster is pure goofy charm. Carve the eye as a big circle, then carve a smaller circle inside it for the pupil, leaving a rind ring between them that glows as the iris. The radiating shaved lines around the eye suggest surprise or mania, depending on your mood. Give it a crooked little mouth with one tooth for maximum silliness. This is a top-tier pick for carving with kids because there is exactly one shape to get right and everything else is decoration. It also works brilliantly on lumpy, odd-shaped pumpkins — the weirder the pumpkin, the funnier the monster. I carved one on a wart-covered gourd last year and it was the undisputed star of the porch. Fast, funny, and nearly impossible to mess up.
23. Jack-O’-Lantern Family Trio
One pumpkin is a decoration; three pumpkins in descending sizes is a family. Carve a big “parent” pumpkin with a classic grin, a medium one with a goofy surprised face, and a tiny one with a simple sleepy smile, then group them on the porch steps like a portrait. The charm is in the size graduation and the contrasting expressions — give the little one the simplest face so it reads as the baby. This is less a carving technique and more a display idea, but it transforms basic faces into something people remember. I do this every year now: the trio takes about an hour total since each face is simple, and it anchors the whole porch display. Vary the light inside each — warm in the big one, cool-white in the small one — for a lovely layered glow. If you are building a bigger autumn display, our fall decor ideas roundup will help you style around them.
24. Day of the Dead Sugar Skull
Etched, not cut: shave an ornate sugar-skull design into the pumpkin — flower eyes, heart nose, decorative swirls on the cheeks — using a Dremel or linoleum cutter at varying depths. Nothing gets cut through except maybe the eye centers, so the whole design glows in soft tonal layers like candlelight through lace. Find a sugar skull printable stencil, transfer it with the tape method, and work from the center outward so you do not smudge your poked guidelines. This is the most advanced technique on this list and the most rewarding; the depth control takes practice, so try it on the back of the pumpkin first. Rub petroleum jelly over the finished etching to keep the pale flesh from browning too fast. It is a genuinely beautiful carve that doubles as cultural celebration decor, and it will outlast every cut-through design on your porch by days.
25. Drippy Melted Face
End with a laugh: carve a normal face, then carve long drips running down from the eyes and mouth like the pumpkin is melting. The drips are just elongated teardrop cuts extending downward from the facial features — carve the face first, then add the drips, keeping them thick enough to survive. It looks like the jack-o’-lantern is crying wax or melting in horror at its own existence, and it cracks everyone up. The comedy lands best on a slightly lopsided pumpkin, where the “melting” reads as intentional character rather than a mistake. This is my traditional last carve of the season, done with whatever pumpkin is left and whatever energy I have left — usually on the night before Halloween with a podcast on. It is proof that the best pumpkin carving ideas are not always the prettiest; sometimes they are just the ones that make you grin every time you walk past them.
Crafting Tips
- Gut thoroughly and scrape the inner wall down to about an inch thick — an ice cream scoop with a serrated edge is the fastest tool for this, and thinner walls are dramatically easier to carve.
- Match the tool to the cut: a serrated carving saw for outlines, an X-ACTO knife for fine detail (adults only, always cut away from your body), and a linoleum cutter or Dremel for shaved and etched designs.
- Use the stencil method for anything complex: print the design, tape it to the pumpkin with painter’s tape, poke along the lines with a pin, remove the paper, and carve dot to dot. It is how every crisp design you admire was actually made.
- Light with battery-operated tea lights or LED flameless candles instead of real candles — you get the same glow with zero fire risk, and they will not scorch the pumpkin’s interior.
- Make your carve last: soak the finished pumpkin in a bleach-water soak (one teaspoon of bleach per gallon) for a few hours, pat dry, then rub petroleum jelly on all cut edges to seal in moisture. It buys you several extra days.
- Carve the small, delicate details first while the rind is strongest, and save the big structural cuts for last — a pumpkin with a giant mouth already removed is much harder to carve details into.
Frequently Asked Questions
What are the best Halloween pumpkin carving ideas? The best Halloween pumpkin carving ideas balance impact with your skill level. Beginners should start with classic jack-o’-lantern faces, starry cutouts, or a winking face — all quick and forgiving. If you want spooky, try the vampire face, haunted house silhouette, or skull. For cute, go with the gnome, sleepy moon, or happy ghost. And if you want the design that impresses everyone, etched work like the sugar skull or autumn leaves looks advanced but only needs a cheap linoleum cutter and patience.
What are easy pumpkin carving ideas for beginners? The easiest pumpkin carving ideas are the classic triangle-eye jack-o’-lantern, the toothless grin, starry night cutouts, the winking face, and the bat swarm — none require stencils or freehand talent. Draw your design with a dry-erase marker first, use the small saw from a basic Halloween pumpkin carving kit, and keep shapes chunky since thin details snap as the pumpkin dries. Most beginner designs take twenty minutes or less once the pumpkin is gutted.
What tools do I need to carve a pumpkin? At minimum you need a serrated carving saw (the small one in any Halloween pumpkin carving kit), a sturdy spoon or ice cream scoop for gutting, and a marker for sketching. Nice upgrades: an X-ACTO knife for fine detail work, a linoleum cutter or Dremel for shaved and etched designs, and a drill with small bits for perfect round holes like starry cutouts. For lighting, grab battery-operated tea lights or LED flameless candles — safer than real candles and they last all night. Keep the sharp knives for adults; kids do great with the plastic saws from the kit.
How do I use a stencil for pumpkin carving? Print your design at the size you want, trim the paper, and tape it to the pumpkin with painter’s tape (regular tape can peel the skin). Use a pushpin or the poking tool from your carving kit to poke small holes along every line of the design, then peel the paper off — you are left with a dotted outline. Carve from dot to dot with the small saw, starting with the innermost details and working outward. This tape transfer method is how nearly every crisp, professional-looking carved pumpkin pattern is made, and free printable stencils are everywhere online each October.
Final Thoughts
Here is the thing I have learned after years of carving: the pumpkin people remember is rarely the most technically perfect one. It is the goofy one-eyed monster the kids named, the trio on the steps that looked like a family, the melting face that made the mail carrier laugh. Pick the design that sounds fun, not the one that sounds impressive — you will enjoy the carving more and the result will have more character. And if you end up with leftover mini pumpkins, our mini pumpkin painting ideas will put them to good use without a single knife involved. Happy carving, and may your teeth stay chunky and your stencils stay taped.