Introduction
A store-bought advent calendar is fine — little chocolates, familiar routine, done by Christmas Eve. But a homemade one? That is a different animal entirely. These 18 DIY advent calendar ideas turn December into a daily gift you designed yourself: tiny doors, hidden notes, hand-stuffed treats, and the kind of countdown your family will remember long after the last door opens. I have made the elaborate kind and the last-minute kind, and I can tell you honestly that both work. My first attempt was envelopes strung on twine with a stapler — crooked, lopsided, and my kids fought over who got to open which one. That was ten years ago. These DIY advent calendar ideas cover every skill level, every budget, and every age group, from toddler-proof felt to the kind of adult calendar you will want to keep.
1. Classic Paper Bag Row
Paper lunch bags are the friendliest starting point for a DIY advent calendar: cheap, sturdy, and roomy enough for real treats. Number 24 bags with a bold marker or printed number tags, fold the tops down, and clip them to a length of twine with mini clothespins. I arrange mine in two rows on the wall — odds on top, evens below — so it reads like a little banner installation. Fill with small candies, stickers, or hair ties. The paper bags take stamps and stickers beautifully, which makes this the best style for kids to help decorate. One tip from experience: do not overstuff the bags or the clothespins stretch and pop. If you want the whole thing to feel more finished, add a sprig of dried eucalyptus every few bags.
What you need
24 paper lunch bags, mini clothespins, twine, number tags, and fillers that fit a flat bag without tearing it.
2. Matchbox Tower Calendar
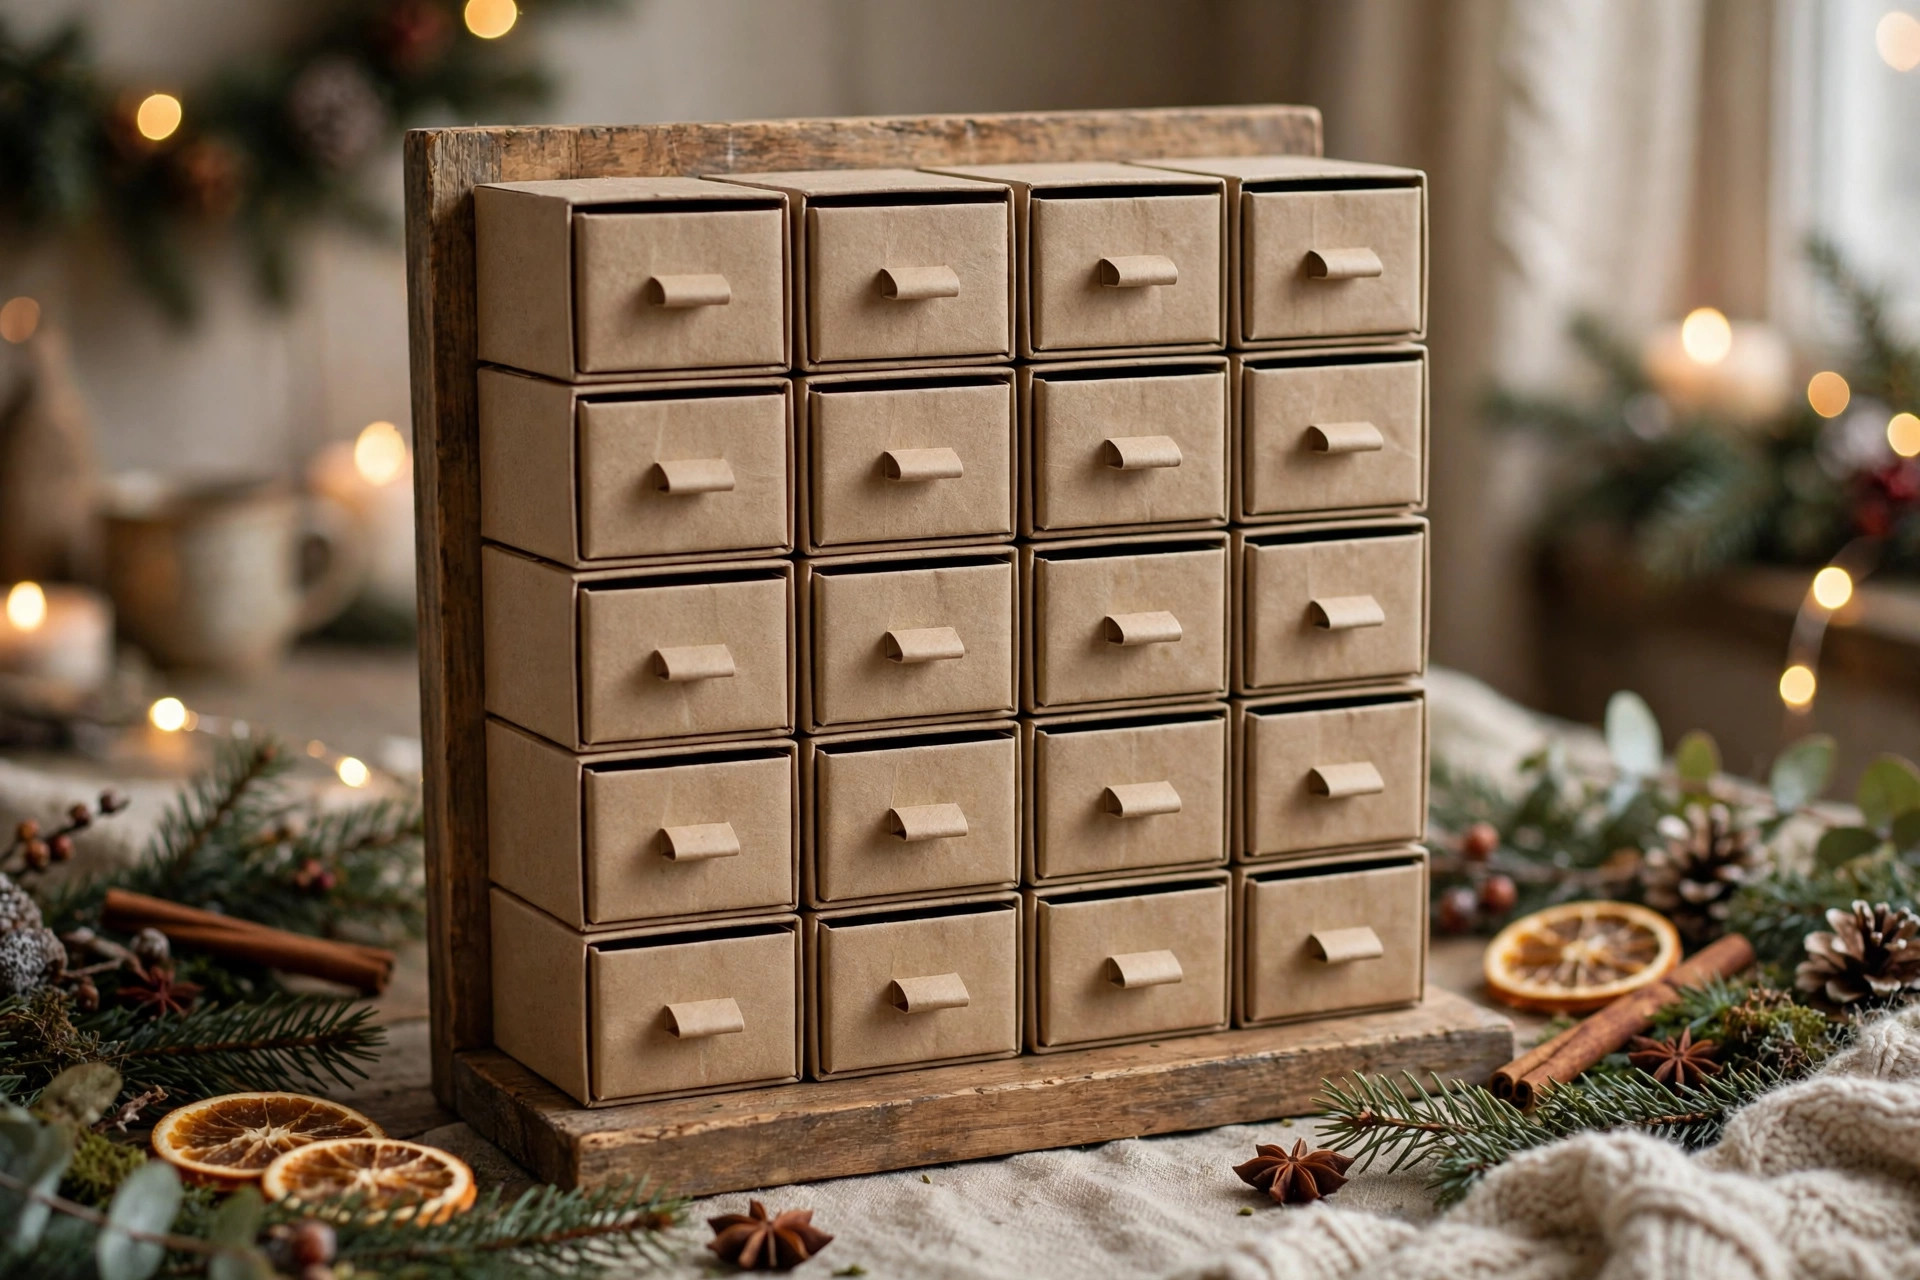
Empty matchboxes are the perfect tiny drawers, and stacked into a tower they look like a miniature apartment building of surprises. Glue the boxes into a grid — six across, four down — onto a sturdy board, then wrap the whole thing in kraft paper with a numbered front on each drawer. The trick is labeling the drawers on the front face only, so the pull tabs stay clean. I fill mine with single chocolates, tiny Lego pieces (one per day toward a mini set), or folded notes. My daughter’s year of the matchbox tower was the year she learned delayed gratification, because one drawer per day was a hard rule she actually respected. Buy empty matchboxes in bulk from a craft supplier rather than emptying 24 of your own — ask me how I know.
3. Envelope String Garland
The envelope garland is the calendar I recommend to every beginner, because it is nearly impossible to get wrong. Seal 24 envelopes — coin envelopes for small treats, standard ones for notes and gift cards — stamp a number on each, and string them along twine with clips or just poke holes and thread the string through. The envelopes flutter gently when the heat kicks on, which I find charming. This is also the most giftable format: make one for a friend, fill it with tea bags and hand cream samples, and tie the whole garland into a box. I once made a version for my sister where every envelope held a photo from our childhood Decembers, and she cried at number twelve. No candy required.
4. Wooden House Village Calendar
Craft stores sell unfinished wooden houses with little hinged doors — Michaels stocks them every October — and they turn into the sturdiest advent calendar you will ever own. Paint or stain the houses, glue them in a row on a wood base, and number the doors with a paint pen. This is a keeper piece: you reuse it every year, which over five years makes it the cheapest calendar per use on this list. I fill the tiny rooms with wrapped caramels and little rolled notes with one December memory each. The painting takes an evening with a podcast on, and if you are decorating a whole Christmas mantel, these houses anchor the display beautifully.
Kid-friendly tweak
Let kids paint the houses with washable tempera first, then seal with a clear coat before any food goes inside.

5. Felt Pocket Wall Hanging
A felt wall hanging with 24 stitched pockets is the calendar for households with toddlers, because there is nothing to break, spill, or choke on if you choose the fillers carefully. Cut a large felt panel, stitch or hot-glue 24 small pockets in a grid, and applique numbers with contrasting felt or embroidery floss. I hang mine with a wooden dowel and ribbon. Fill with soft things: stickers, hair clips, crayon singles, tiny stuffed animals, or — my favorite — one puzzle piece per day toward a Christmas puzzle assembled on the 24th. The pockets also fit folded paper crafts your kids made themselves, which closes a lovely loop.
6. Muffin Tin Countdown
The muffin tin calendar is the ultimate last-minute save. Cover a 24-cup muffin tin (or two 12-cups) with circles of wrapping paper held by tape, number each one, and fill the cups with whatever you have: chocolates, nuts, small toys, even folded coupons. On each day you punch through the paper — deeply satisfying. I made one of these on December 1st at 9pm when I realized I had forgotten to make the real one, and my kids declared it their favorite ever. The tin is reusable forever, the paper is whatever scraps you have, and the whole project costs almost nothing. It is not the prettiest option on this list, but it might be the most joyful.

7. Cricut Paper House Calendar
If you own a Cricut or Silhouette, the paper house calendar is your showpiece. Cut 24 tiny house shapes from cardstock — there are free cut files everywhere — fold, glue, and number them, then arrange as a village on a tray of faux snow. Each house opens at the roof or base to reveal its treat. The machine does the fiddly cutting, but the folding still takes an evening, so start early in November. I use heavyweight cardstock (65 lb or more) so the houses hold their shape under a chocolate or two. Metallic gold cardstock houses on a white tray look genuinely elegant — this is the calendar I would make for a design-conscious friend, filled with nice chocolates and a few gift cards tucked into the larger houses.
8. Test Tube Spice Calendar
For the cook in your life, fill 24 small test tubes or spice jars with a different baking spice, tea blend, or hot cocoa mix each day — a tasting flight of December flavors. Mount the tubes in a drilled wooden block or a foam-lined box, number the caps, and include a tiny recipe card on days where the spice matters. I made one for my mother-in-law with 24 different loose-leaf teas and she talked about it until Easter. This calendar is genuinely useful rather than just fun, which is why it works so well as one of your handmade gifts. Small glass vials from the craft store are cheapest in the 50-pack, and you will find uses for the leftovers.
How I filled it
Cinnamon sticks and star anise for the baking days, peppermint tea for the 24th, and one tiny packet of vanilla sugar I nearly forgot to label.

9. Toilet Roll Tube Tree
Twenty-four empty toilet roll tubes, glued into a tree shape on cardboard, wrapped in green paper — this is the calendar my kids still ask for, and it costs exactly nothing. Wrap each tube, number it, and fill with small candies before sealing both ends with paper circles. The tree shape reads instantly as Christmas, and building it is a genuinely fun afternoon craft for the whole family. Because the tubes are deep, they hold chunky fillers: bouncy balls, wrapped caramels, little erasers, temporary tattoos. I keep ours flat in a closet between years since it only takes one hot glue gun to repair any damage. If your tubes are crushed, a quick steam over a kettle rounds them out again.
10. Clothespin Tree Wall Calendar
Arrange 24 clothespins on a wall in a triangle — wide at the bottom, one at the top — and clip a small wrapped package to each one. The packages can be tiny paper bags, folded tissue, or even actual mini gifts wrapped in matching paper. This style is all about the wrapping: use one paper pattern for a clean look, or 24 different vintage papers for a maximalist tree. I hang a star at the top pin and drape a string of fairy lights behind the whole thing, which at night makes the tree glow. The best part is reusability: the pins stay up all December, and next year you just clip new packages on. My neighbor copies this every year and adds one ornament to each package — by Christmas she has a fully decorated tree.

11. Magnetic Tin Calendar
Small round tins with clear lids — the kind sold for spices or lip balm — get magnets glued to the back and stick straight to the fridge in a tree or wreath shape. Number the lids with a paint pen or stickers. This calendar lives where the family already gathers, which means nobody forgets to open the day’s tin. I fill mine with a mix: chocolates most days, then a few “adventure” days holding a folded note (tonight we drive to see lights; today we bake cookies together). The tins are the perfect size for a couple of Hershey’s Kisses. When December ends, the tins go back in the craft drawer for spices and beads — nothing wasted.

12. Wine Bottle Advent Calendar
Okay, this one is for the adults. Wrap 24 mini wine bottles (or mini liquor bottles, or fancy sodas) in numbered paper bags or tissue, and arrange them in a wooden crate or wine box. Each evening, the grown-ups open one — a tasting flight through December. I made one for my husband the year our daughter was born and we were not going anywhere; it was the highlight of a very sleep-deprived month. Number the bags 1 through 24 and include a couple of surprise upgrades: a full-size bottle on the 24th, a bag of fancy nuts on a Sunday. Keep it out of reach of little hands, obviously, and this pairs hilariously well with the matchbox tower for the kids — everyone gets a calendar.

13. Origami Box Calendar
Fold 24 origami masu boxes from square paper — no glue, no tape, just folding — and nest a treat inside each one. The boxes themselves are the decoration: use 24 sheets of beautiful patterned paper, double-sided washi paper, or pages from an old atlas for a vintage look. Number the lids with a sticker or stamp. Folding 24 boxes takes a couple of evenings in front of the television; by the tenth box your hands will do it automatically. I love that the calendar is pure paper craft — nothing to buy except the paper, nothing to store afterward except flat paper, and the boxes get reused as gift boxes all year. This one quietly became my mother-in-law’s favorite when she saw the atlas-paper version.
What you need
24 six-inch squares of patterned paper, a bone folder for crisp creases, number stickers, and treats small enough to fit a folded box.
14. Pallet Wood Pocket Calendar
A strip of pallet wood or a reclaimed fence board, 24 small muslin bags nailed or pinned in rows, numbers burned or painted on — this is the farmhouse-style calendar that looks like it came from a craft fair. The wood gives it weight and presence, so it works as actual wall decor all month. I distressed my board with white chalk paint and sandpaper for that weathered look, then pinned the bags with tiny brass tacks. Fill with anything that fits a 3-inch bag: candy, ornaments, small crochet snowflakes. Because the bags hang from tacks, you can swap the fillers in seconds if plans change — a flexibility the glued-together styles do not have.

15. Balloon Pop Calendar
Stuff 24 small balloons with a treat and a folded note, inflate them, pin them to a board, and let the kids pop one each day. This is the loudest, silliest calendar on the list and the one with the highest shriek-per-dollar ratio. Use a pin or a thumbtack for popping, and fill the balloons before inflating: tiny candies, stickers, and a note with that day’s activity work best. I learned to write the activity notes first and plan them around our actual December schedule — “bake night” on a day we are home, “library trip” on a Saturday. The popping is genuinely exciting every single time. Supervise small children with balloon pieces, and keep a spare balloon or two for the inevitable pre-December accidental pop.
16. Book Advent Calendar
Wrap 24 Christmas books — picture books, chapter books, a couple of activity books — and let the kids unwrap one each evening for bedtime reading. This is the calendar that builds a tradition: by the 24th you have a whole December library, and the books come out again every year. Buy secondhand to keep costs down; thrift stores in November are full of Christmas books. I number the wrapping with big stickers and arrange the stack under the tree like presents. The unwrapping ritual slows the evening down in the best way. If 24 new books is too many, wrap 12 and do one every other day, or mix in library books you return afterward. My kids’ favorite part is re-reading the whole stack in one marathon on Christmas Eve.

17. Sock Garland Calendar
Twenty-four baby socks or small Christmas socks, each holding a treat, strung on a ribbon like a garland across the mantel. It is absurdly cute and costs almost nothing if you buy the socks in bulk packs. I tie each sock closed with a bit of twine and a numbered tag, alternating sock patterns for a patchwork look. This calendar is perfect for babies and toddlers: the socks are soft, there are no small hard parts to worry about, and unwrapping is just untying. Fill with puffs, teething biscuits, soft finger puppets, or — for older kids — one sock per day holding a piece of a Lego set. Hang it where the baby cannot reach it unsupervised, for the same reason you hang everything else.
Kid-friendly tweak
Let toddlers “help” by dropping soft fillers into the socks — they will remember stuffing them more than opening them.
18. Reverse Kindness Calendar
End the list with the calendar that gives instead of gets. Each day holds a small act of kindness written on a card: donate a toy, bake for a neighbor, write a thank-you note, pick up litter at the park. I pin the cards to a simple board and we flip each one as we do it. The first year we tried this, my kids grumbled about day three — and by day twenty they were suggesting their own additions. It pairs beautifully with any other calendar on this list: open the treat in the morning, do the kindness in the afternoon. If you want one physical keepsake, keep a jar beside the board and drop in a note each night about what you did. Reading them all on New Year’s Eve has become one of our favorite traditions. And if you need more December project ideas while you are at it, my gingerbread house decorating ideas make a perfect weekend project to do together.

Styling Tips
- Fill the calendar the weekend before December — fillers decided at midnight on the 30th are always worse than fillers decided with a cup of tea and a list.
- Mix treat days with activity days and a few “wild card” surprises; a calendar that is all candy gets boring by the second week.
- Size your fillers to the containers first, not the other way around — nothing kills the fun like a chocolate that will not fit through the door.
- Number everything clearly and double-check the sequence; skipping from 14 to 16 causes genuine distress in small children.
- For keepsake calendars, use acid-free paper for the notes and photos so they survive years of reuse.
- Photograph the finished calendar before December 1st — it will never look this tidy again, and you will want the picture.
Frequently Asked Questions
How do I make an advent calendar? Pick a container style that matches your time and budget — envelopes, paper bags, or a muffin tin for easy; matchboxes or origami boxes for medium; a wooden village or felt wall hanging for a keepsake. Number 24 containers, fill them with treats or activity notes, arrange them as a garland, board, or tree shape, and open one per day starting December 1st.
When do you start an advent calendar? Traditional advent calendars start on December 1st and run through December 24th — one door per day. Some families start on the first Sunday of Advent, which moves between late November and early December, but December 1st is the standard for DIY calendars and the one your numbered containers should follow.
What do you put in an advent calendar? Small chocolates and candies are classic, but the best fillers mix it up: stickers, hair ties, Lego pieces, tea bags, tiny toys, puzzle pieces, and folded notes with activities like baking night or a drive to see lights. For adults, try mini bottles, spice samples, or gift cards; for babies, soft snacks and finger puppets.
How do I make a DIY advent calendar for adults? Skip the kids’ candy and go for a tasting or experience format: mini wine bottles in numbered bags, 24 spice or tea samples in test tubes, or envelopes holding a daily date-night idea, a gift card, or a favorite photo. The wine bottle crate and the test tube spice calendar in this list are both built for grown-ups.
Final Thoughts
The calendar my kids remember is not the prettiest one I made — it is the muffin tin from the year I forgot, patched together at 9pm with wrapping-paper scraps. That tells you everything about what matters here. Pick the style that fits your December, fill it with things your people actually love, and do not stress about perfection. Twenty-four little surprises, made by hand, will always beat a store shelf.